
OPNSense + Nginx Reverse Proxy for your Homelab
This is as much an explanation for my future self as it is a guide for you all.
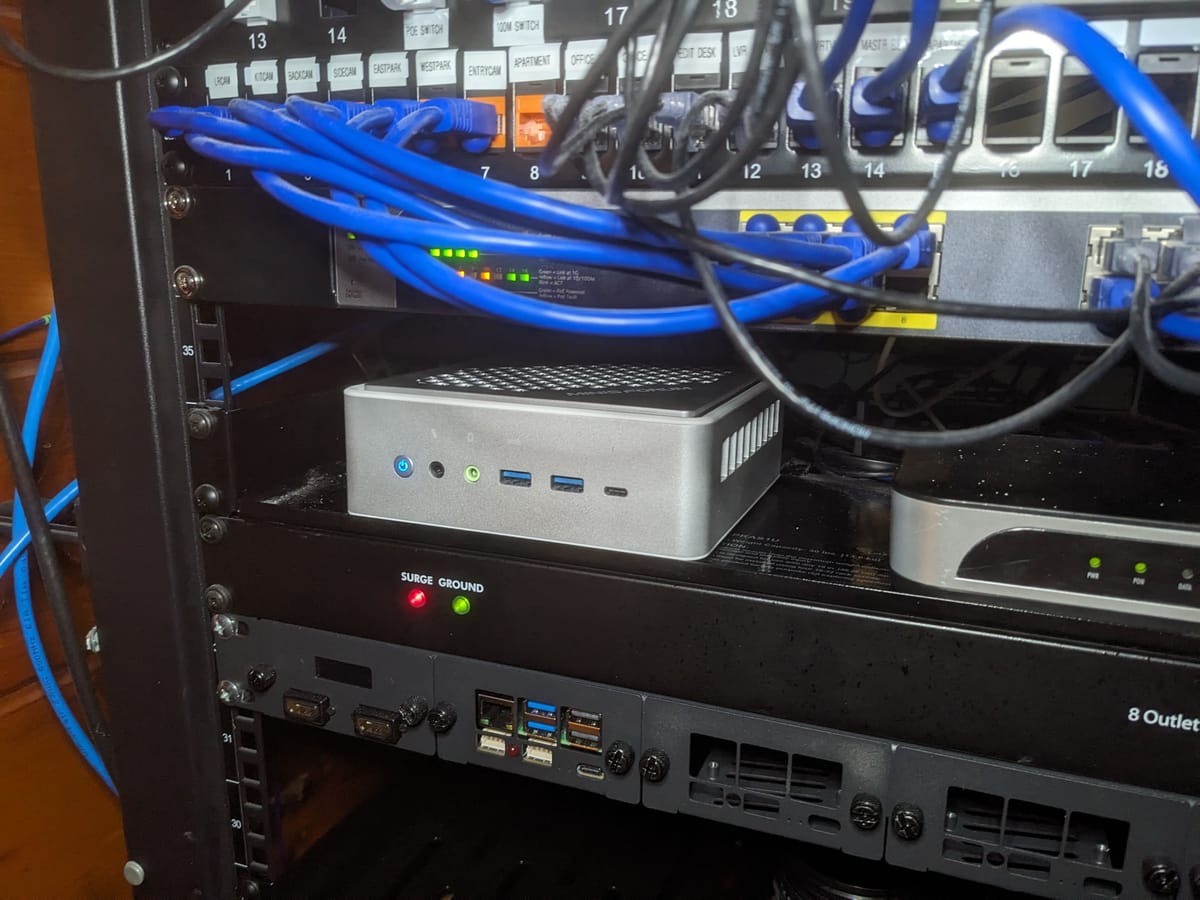
My old firewall died on me just the other day. I wasn't too broken up about it since it was kind of a POS, if I'm being honest. While looking for a suitable replacement, I stumbled across this Intel-based EliteMini TH50 mini PC that I wasn't doing anything with. I've had it in my collection for quite some time (actually, it was here on the server rack not doing anything) so I decided to put it to good use.
This will be a good replacement since it's got two NICs!
But why would I want to do something like this? What's the point of having a firewall?
Firewalls: a (very) brief introduction
A firewall acts as a layer of separation between the wider Internet and your local network. This gives you control over both ingress and egress and enhances your security.
But this also offers an opportunity. I've got dozens up on dozens of services running on my homelab. (We'll get to that in a second). But essentially, the firewall can act as a bridge from the public internet to a service I'm running on premises. Essentially, what we're going to set up is a map that takes a request to your domain (let's say nextcloud.example.cloud) and directs it to the local IP address of a service I'm running here.
This is known as a "Reverse Proxy" and it allows us to take our single static IP address and serve an essentially limitless number of services from it.
What is a Homelab?
Well, to put it succinctly, a homelab is a server rack you run at home. For some it could be an up cycled PC running Ubuntu Server. For others, it could be a NAS in your closet. For me, though, it looks like this:
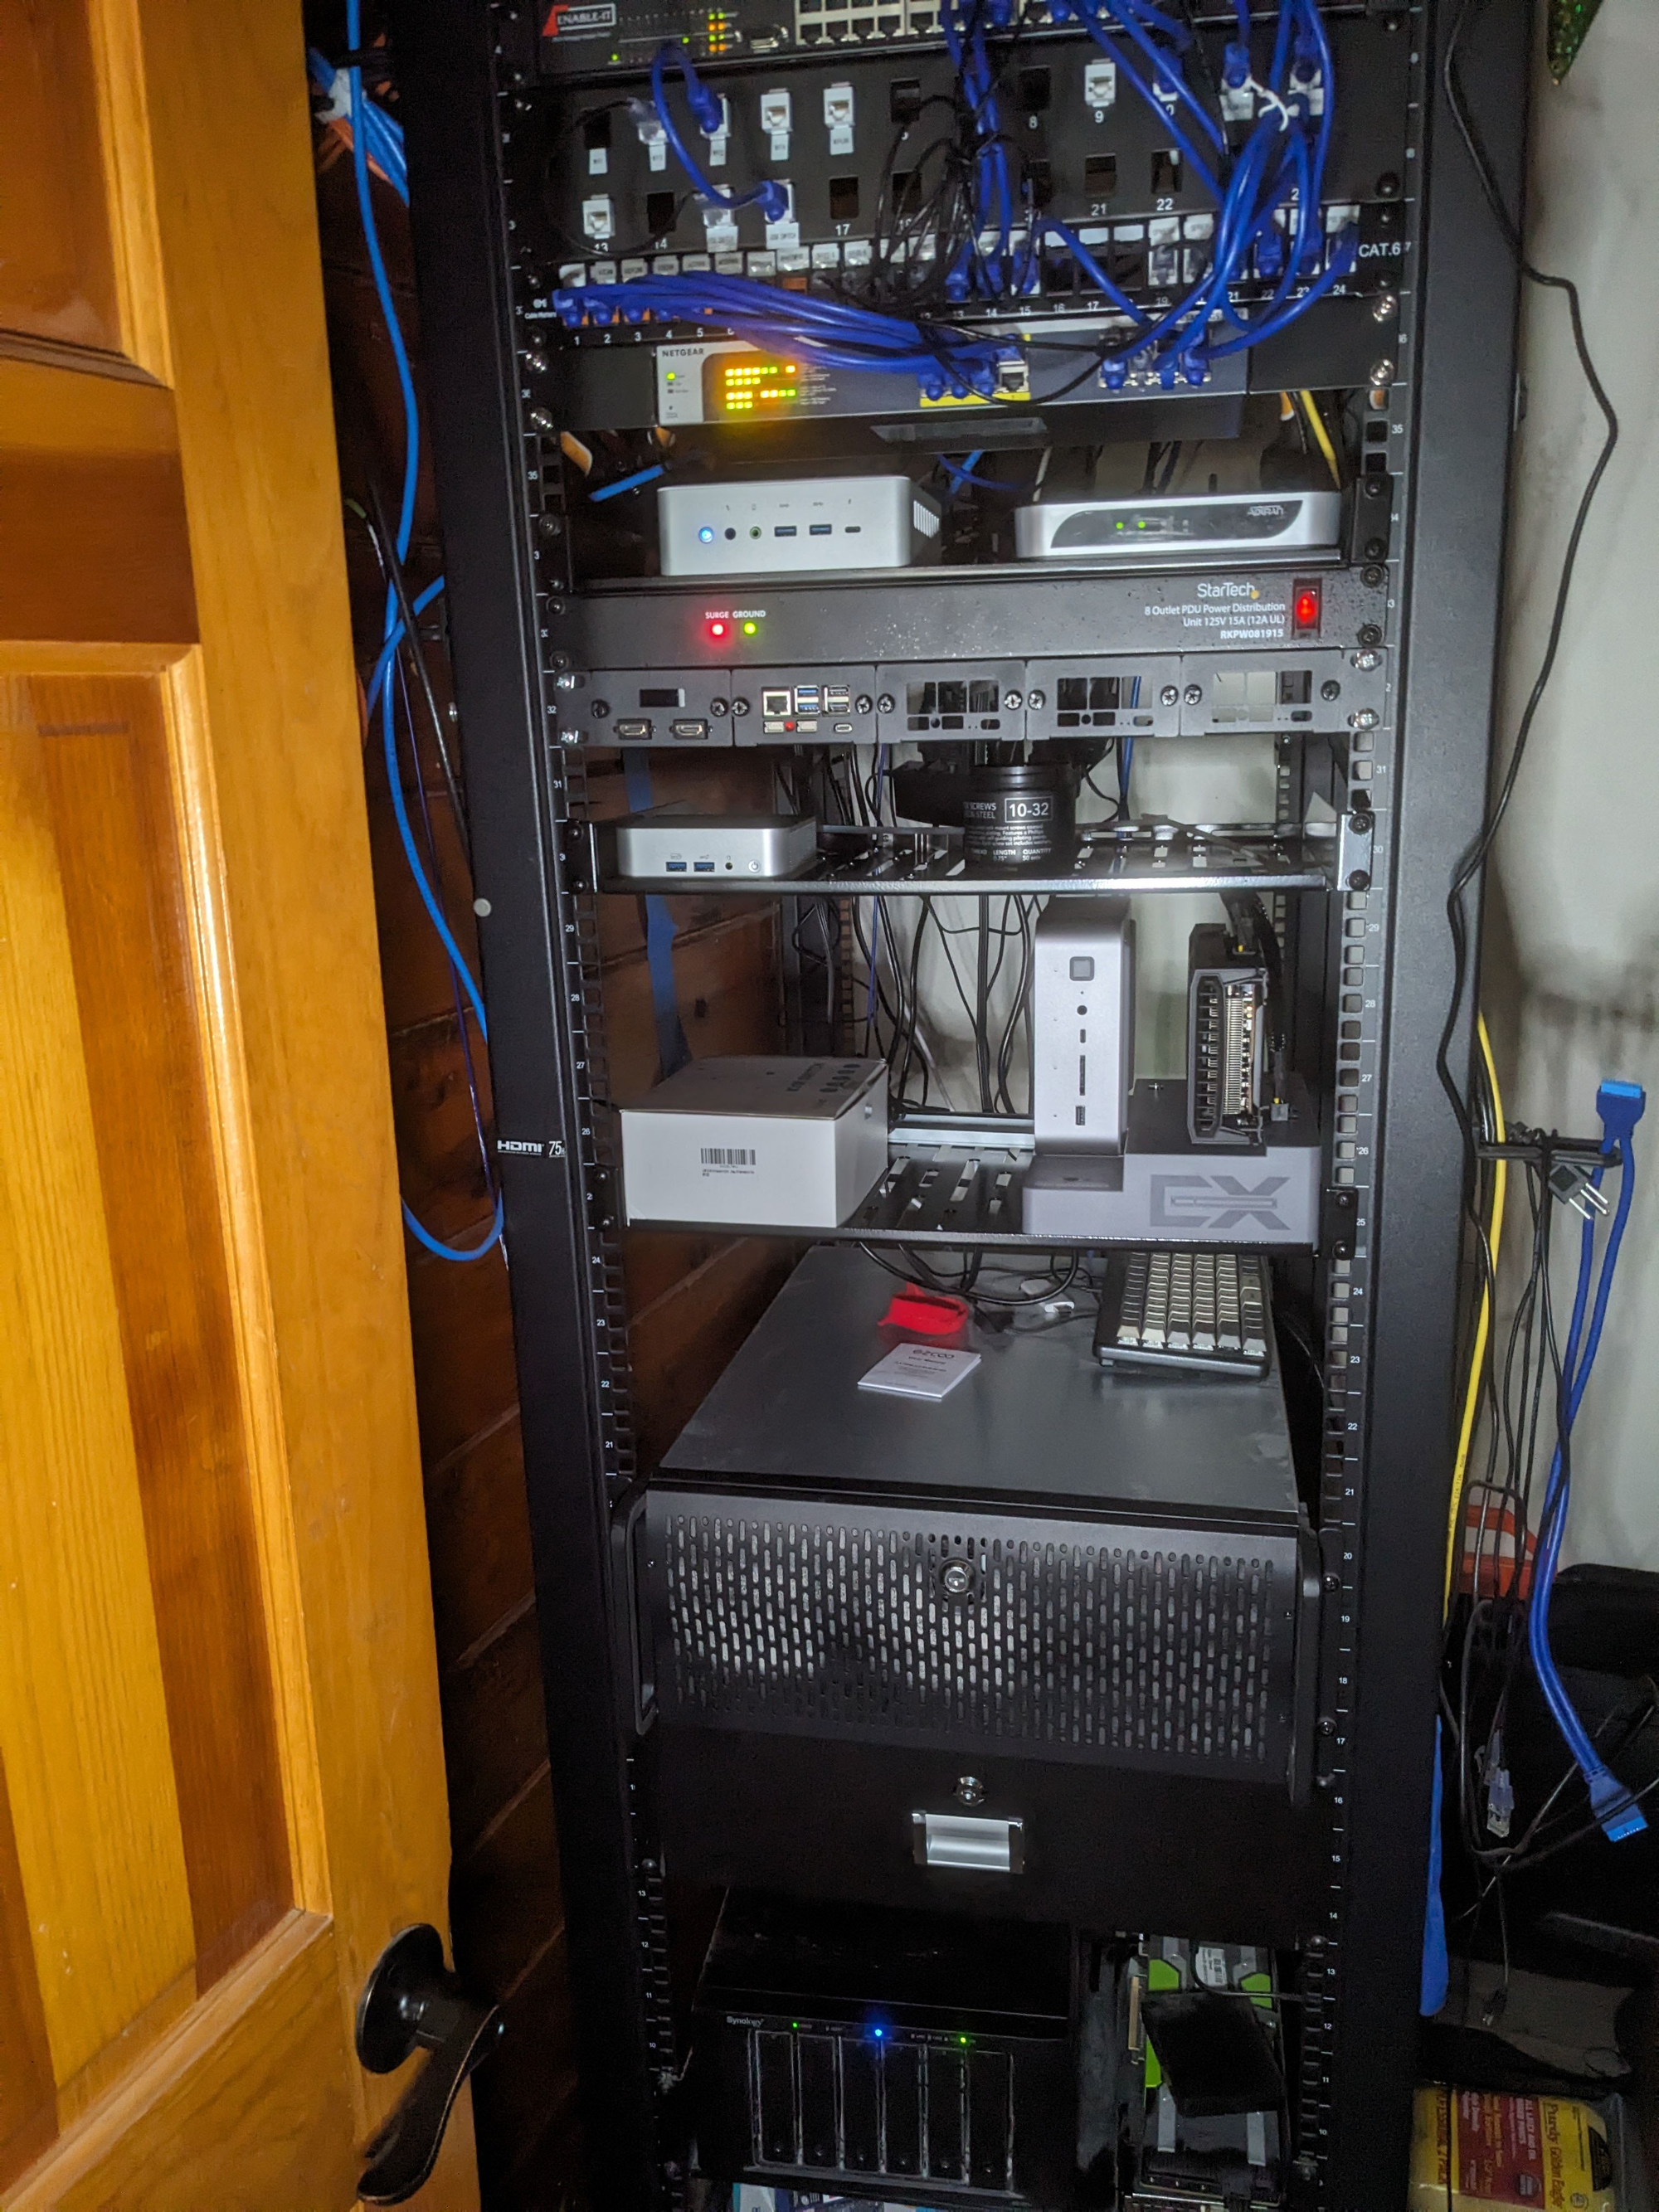
What do I do with all this? Well, I've got over 60 TB of storage here across multiple devices. I'm running a Nextcloud server, an Outline instance for writing and coordinating my podcast, I have an RSS reader, an instance of RetroNAS, and Home Assistant (along with a development server for every one of my clients).
Managing all of that (not to mention responsibly and securely exposing them to the open web) has been a challenge. That was until I discovered the Nginx plugin for OPNSense.
OPNSense is a firewall and routing operating system and it's the one I use. I've found it to be considerably better in terms of hardware compatibility over something like PFsense.
The Task At Hand
I AM NOT RESPONSIBLE for any data loss, doxing, hacking, malware, financial ruin, or death that may or may not result from your following along with this article.
In this article, I'm going to show you how to configure OPNSense for your home network. I'll show you how to map domains and subdomains to various services in your network and serve them securely via HTTPS TLS encryption!
Importantly, this guide covers all the bases and explains every step you need to take to map a domain like nextcloud.example.cloud to a Nextcloud instance running locally.
But this also applies to any web-based service you might be running like Proxmox, Outline, Plex, Jellyfin, FreshRSS, RomM, Home Assistant, or others!
1 – Install OPNSense
The process for doing this is just like any other distro install. Use rufus or another tool to write the OPNSense ISO to a USB stick.
nano, dvd, vga, and serial. For our purposes, vga is what we want.Once you've prepared your installation media, run through the setup on the target hardware. But I will say that you should have both network interfaces (LAN & WAN sides) connected when setting up your OPNSense box.
I won't go through the whole process here.
If you have a static IP address, you'll need to ensure it's configured properly, first. Follow your ISP's instructions. I had to call my ISP's tech support to get routing working properly as they have additional security measures in place that I've never encountered before.
1.a – Configure OPNSense
Navigate to System → Settings → Administration and change the TCP port field to something other than 80 or 443. Then, also check the HTTP Redirect field to disable web GUI redirect rule.

Now save these settings.
2 – Port Setup
Let's navigate to Firewall → Aliases and create a new alias by using the orange + button on the right.
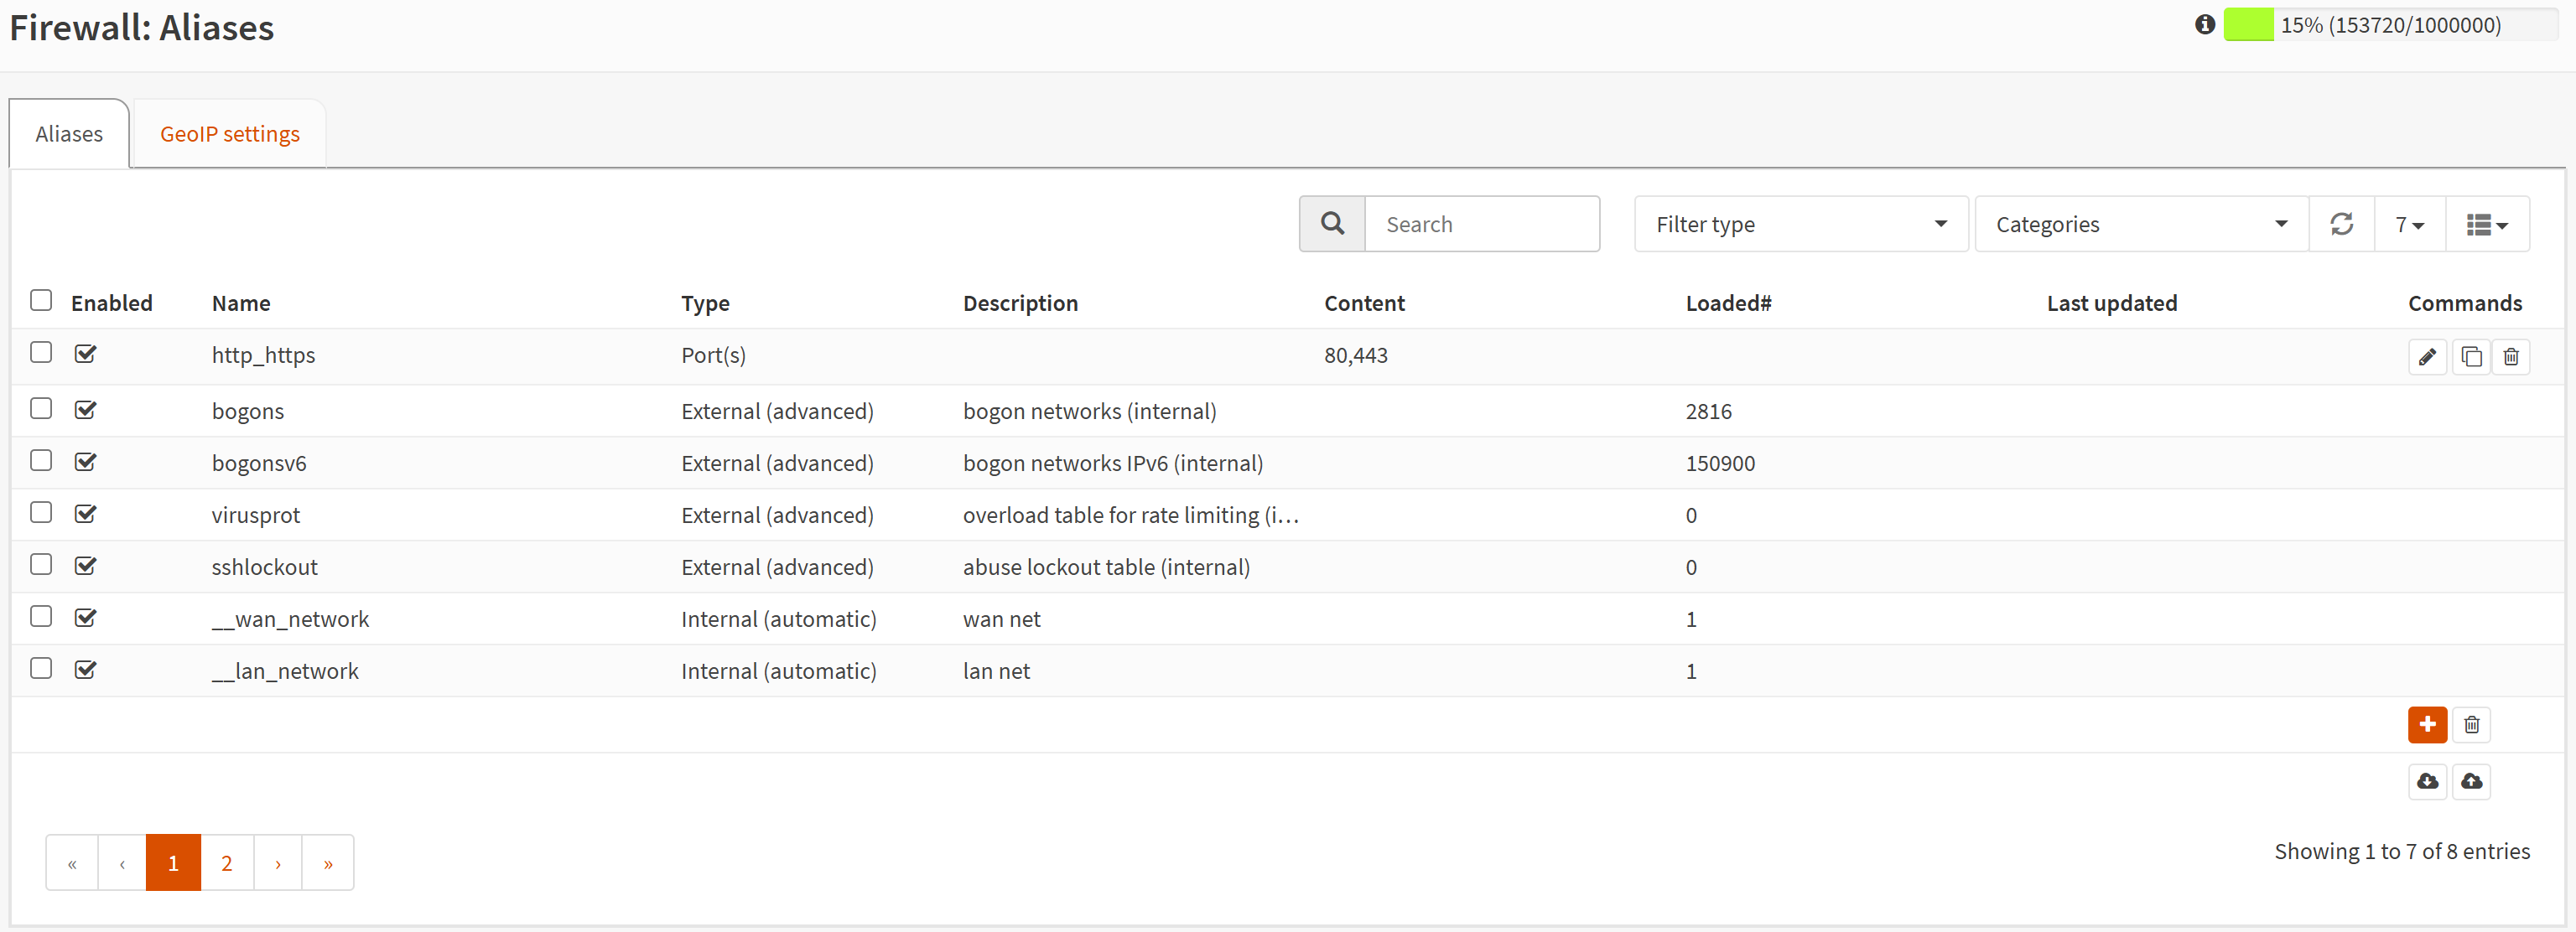
I'll call it http_https but you can name it whatever you want.
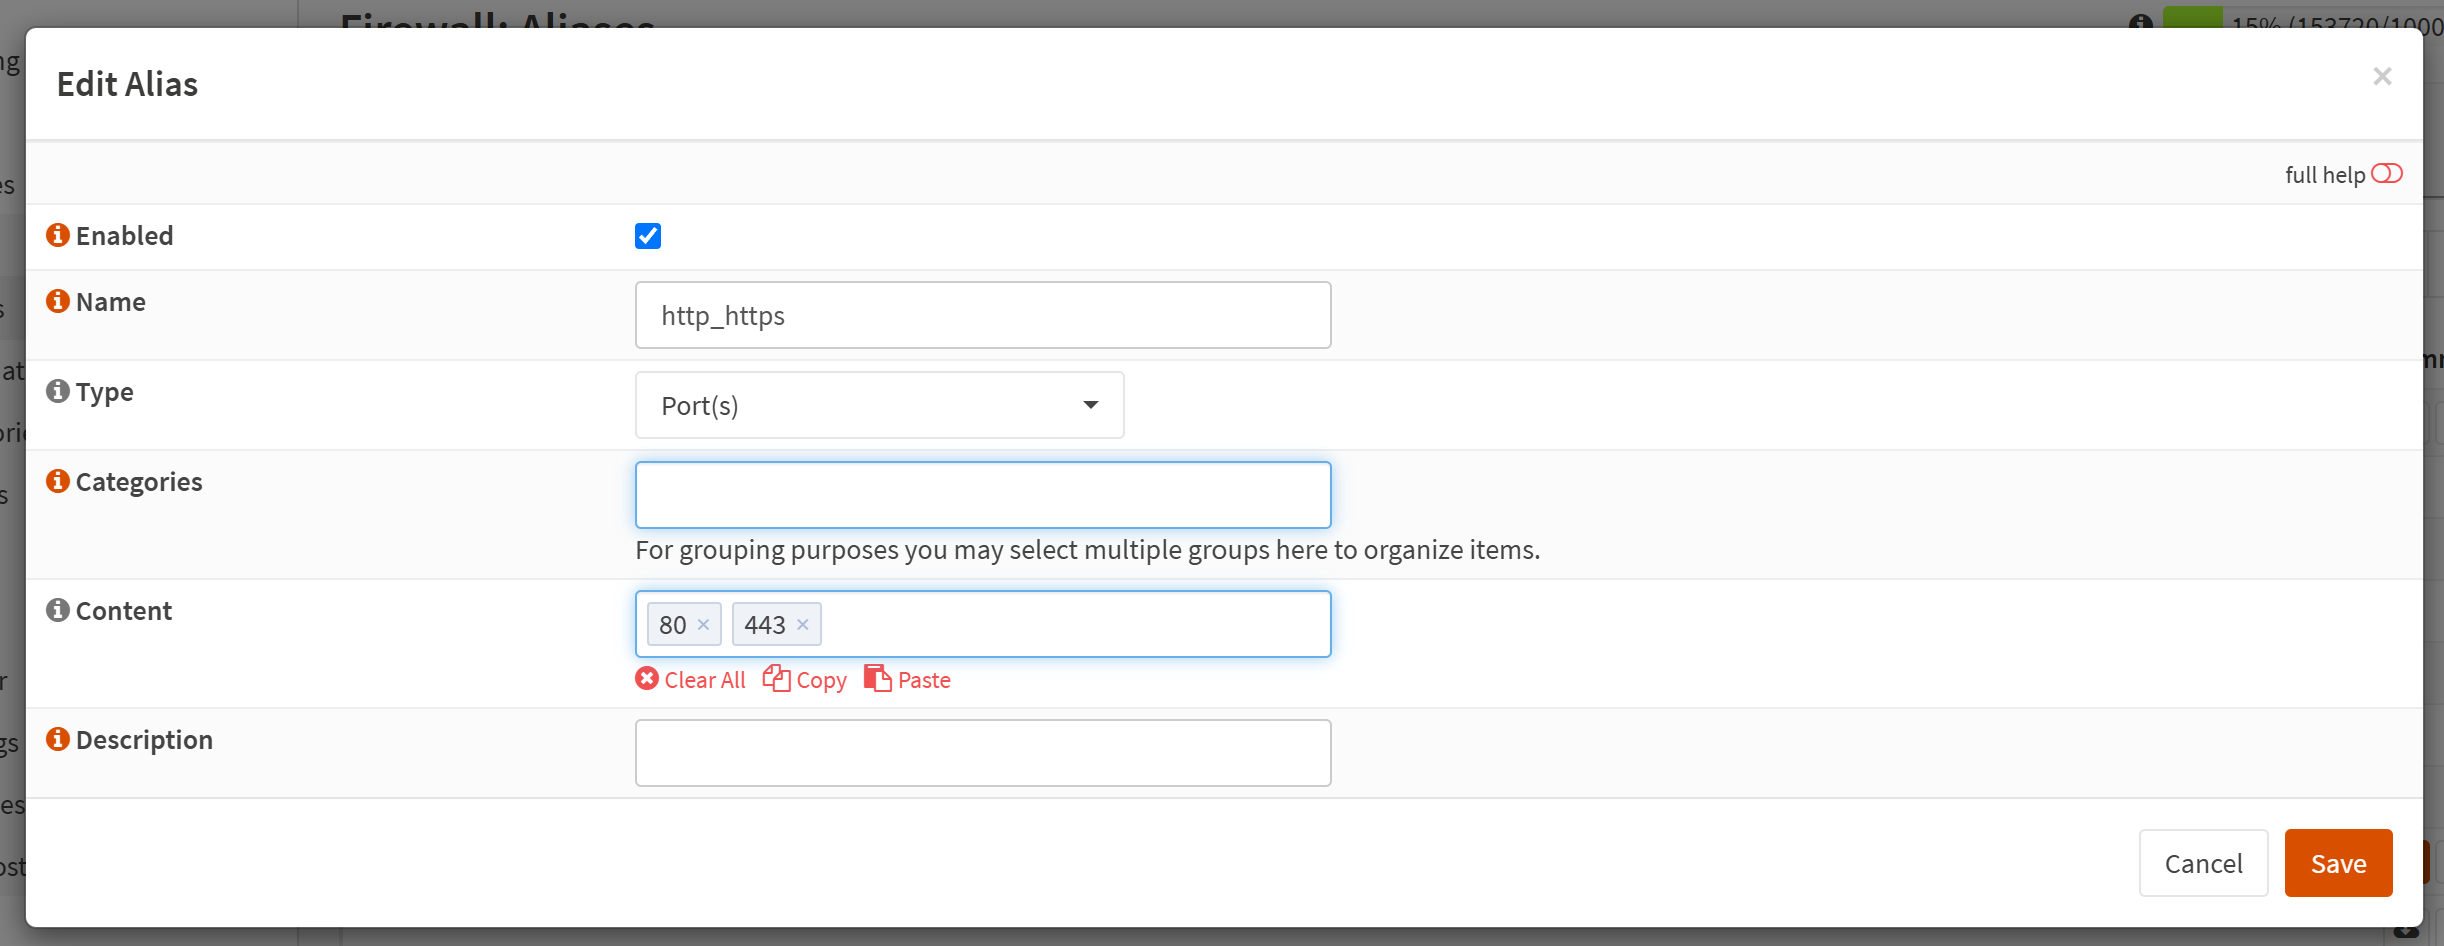
In the Content field, you should add 80 and 443. These are the typical HTTP (port 80) and HTTPS (port 443) ports. By default, your firewall blocks all access to incoming requests on all ports for maximum security. What we're doing here is opening these ports so that Nginx can listen for incoming requests and route them properly on our LAN.
2.a – Configure WAN ports
Now, let's go to Firewall → Rules → WAN and add a new one with the following settings.
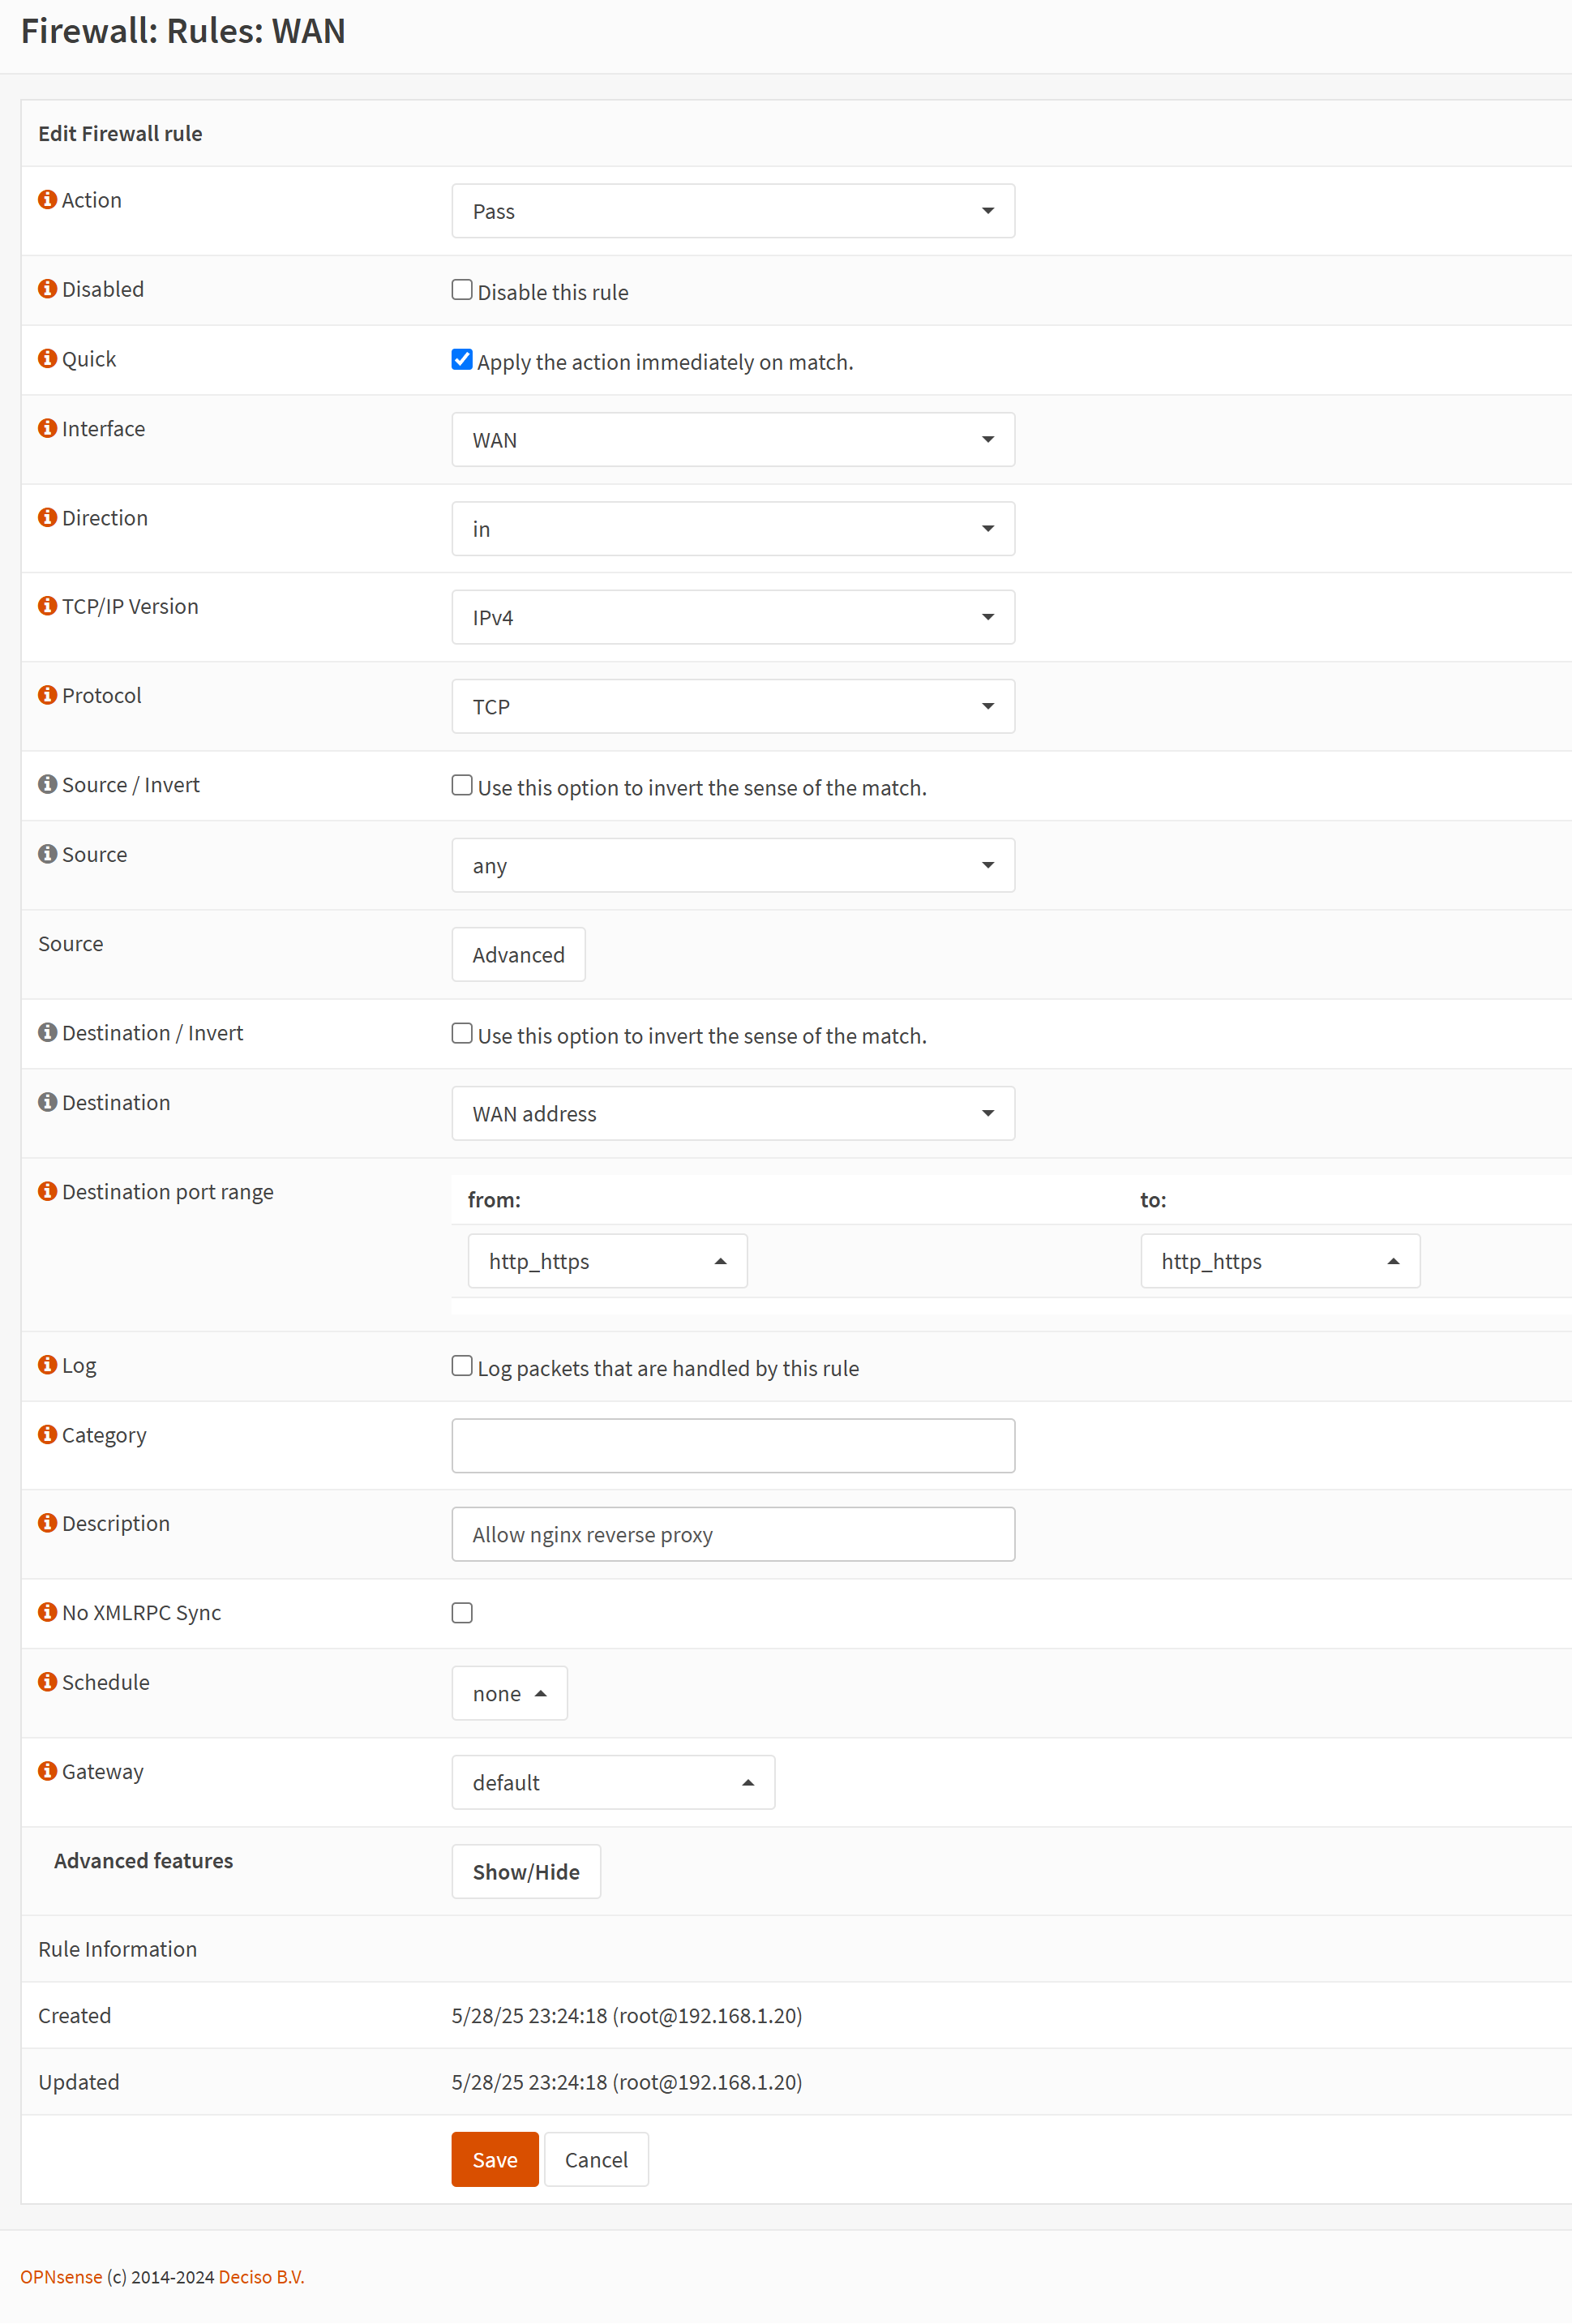
Once you've saved this, you'll see this "Apply changes" button.
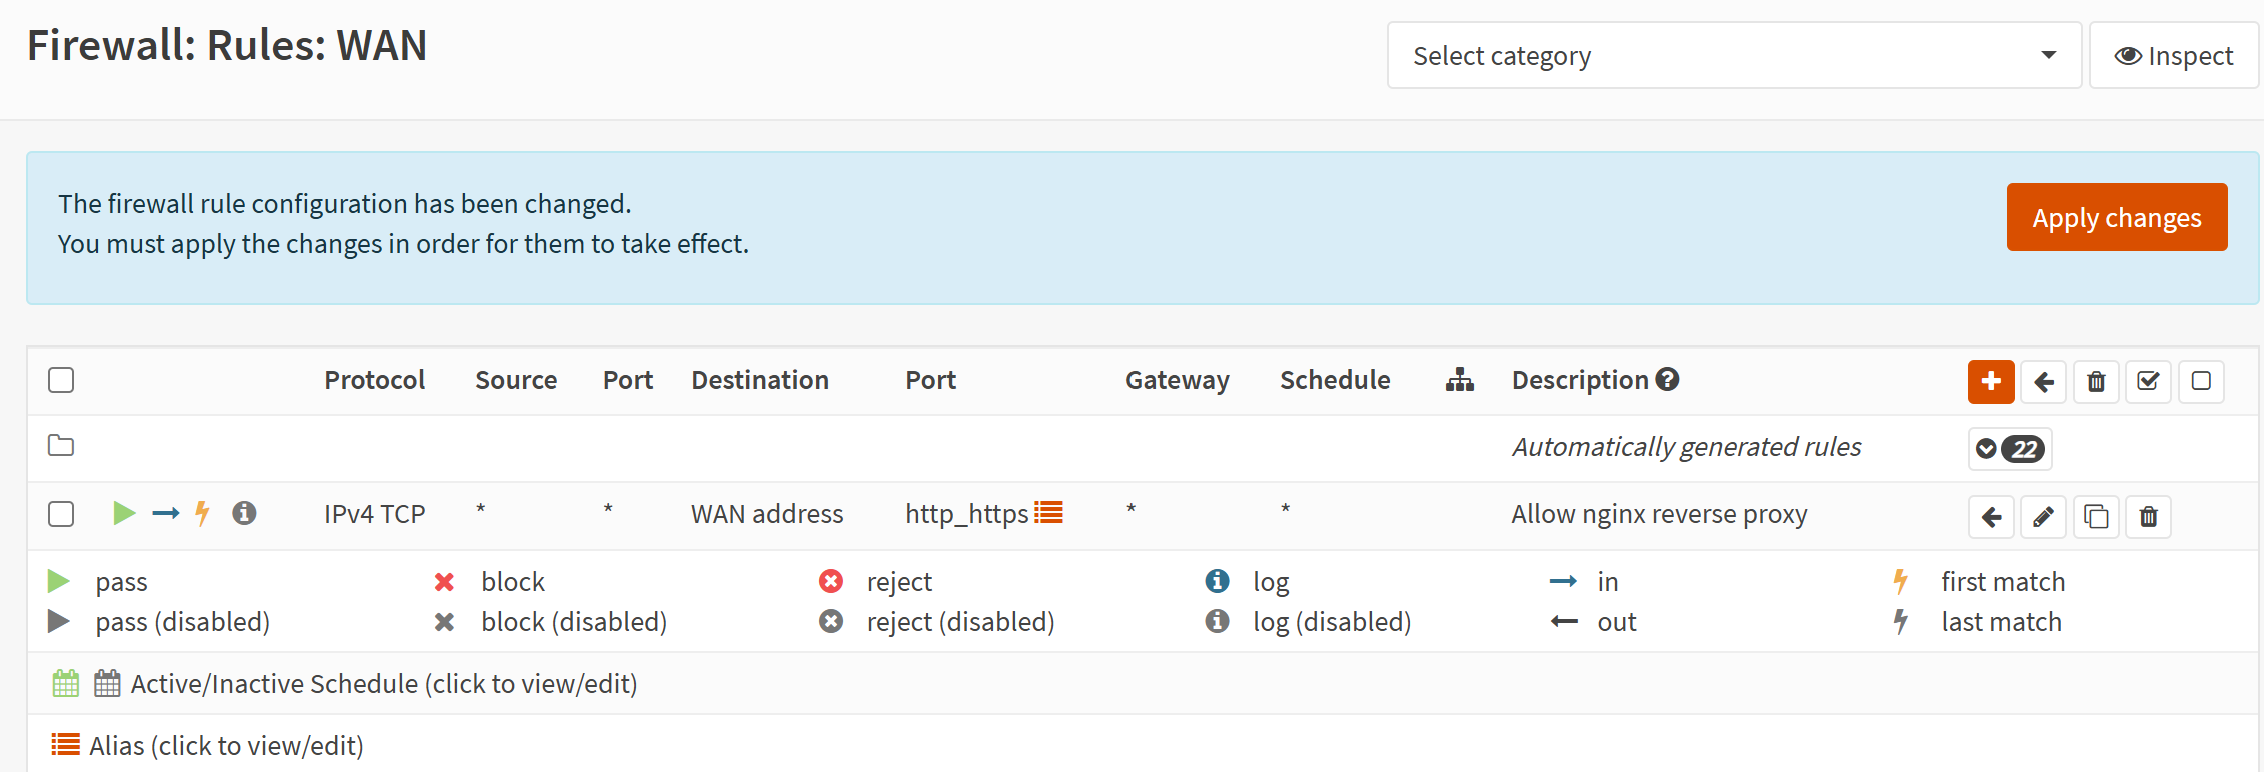
Click that button and now we can move on to the next step!
2 – Install ACME Plugin
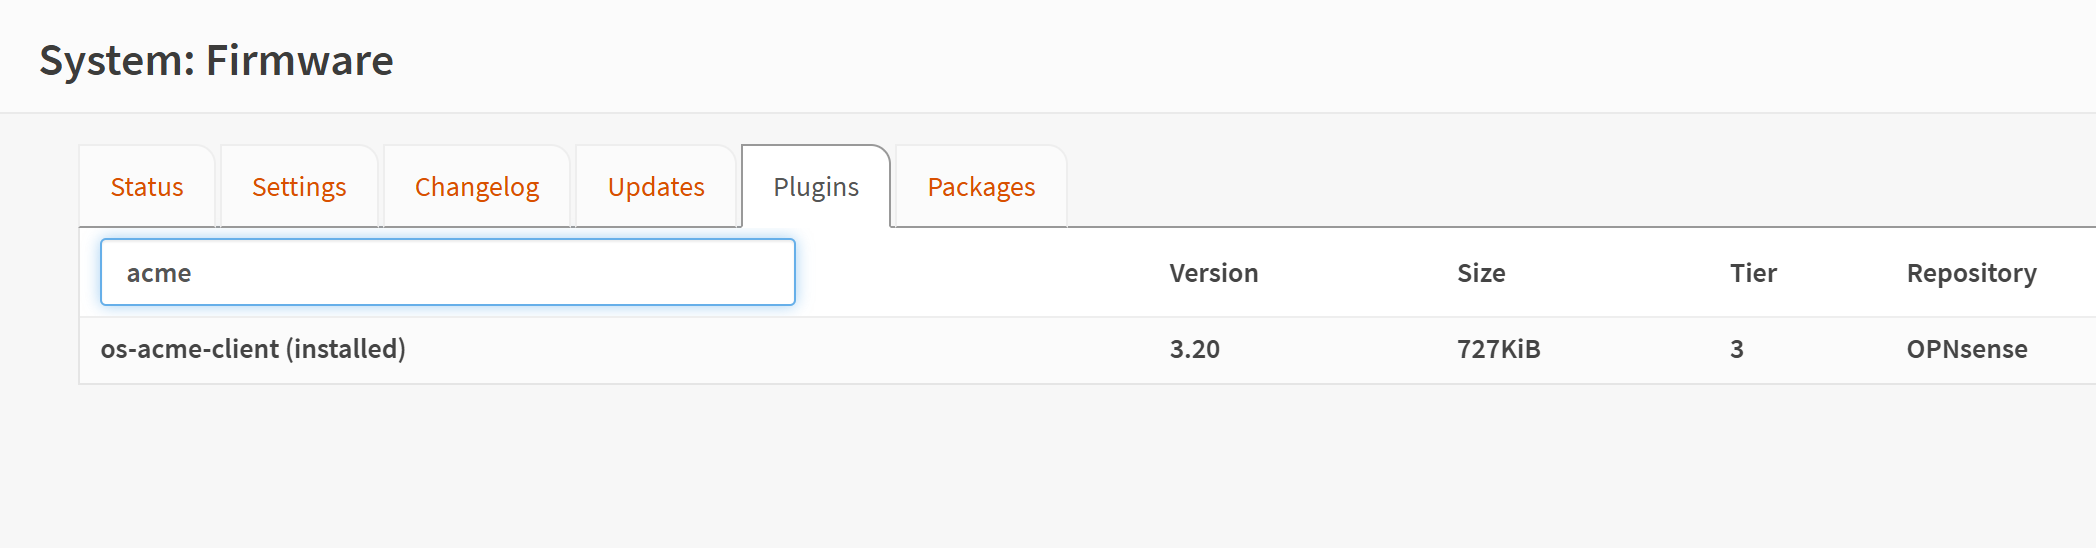
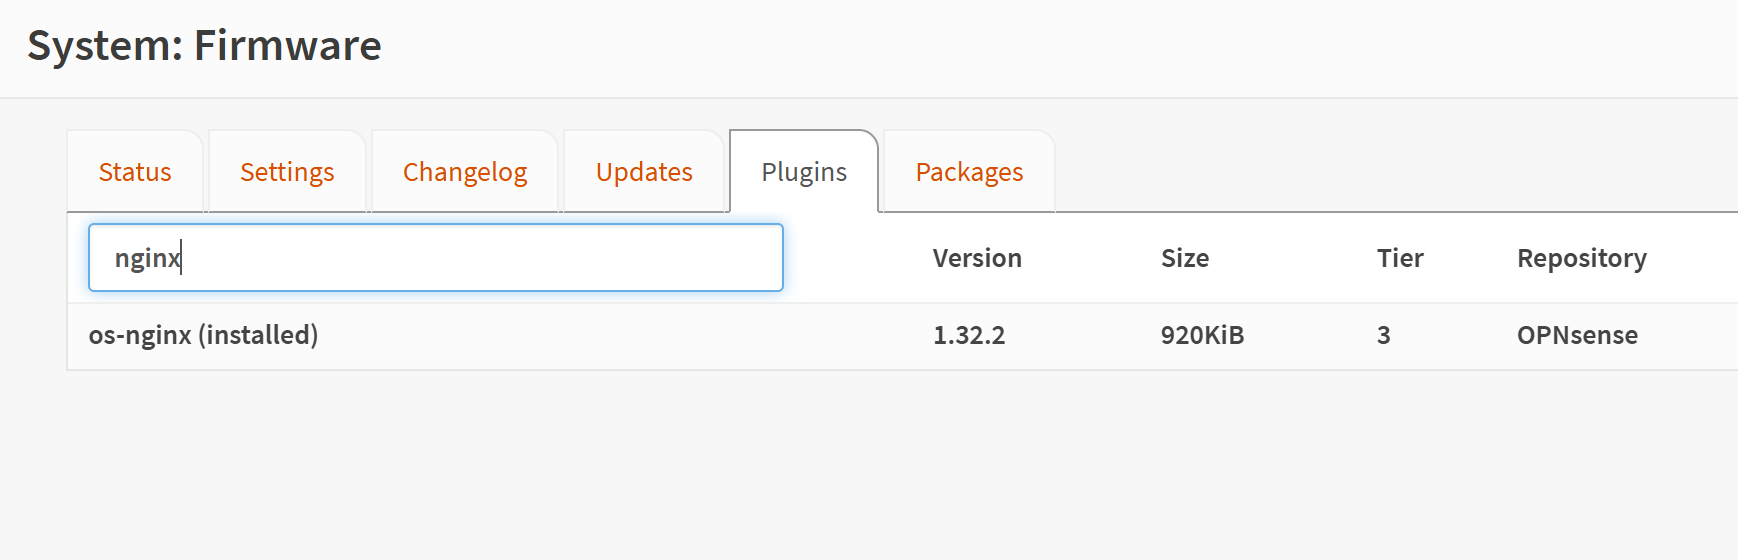
Once OPNSense is set up and our firewall is ready to go, we need to navigate to System → Firmware → Plugins.
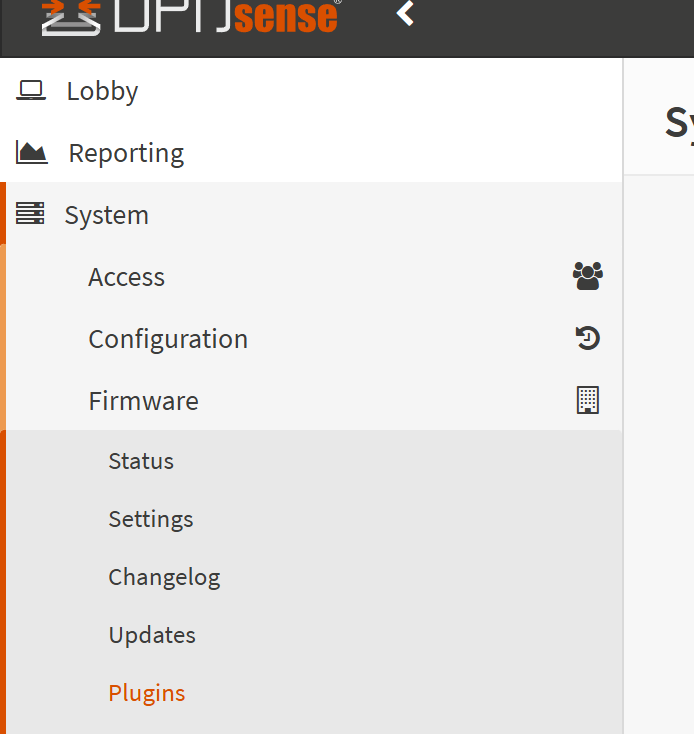
Search for os-acme-client and install it.
Now, let's navigate to Services → ACME Client → Settings, then select the Settings tab and check the Enable Plugin box. Then choose Apply.
2.a – Create an ACME Account
Next, go to Services → ACME Client → Accounts and click the + button to create a new client.
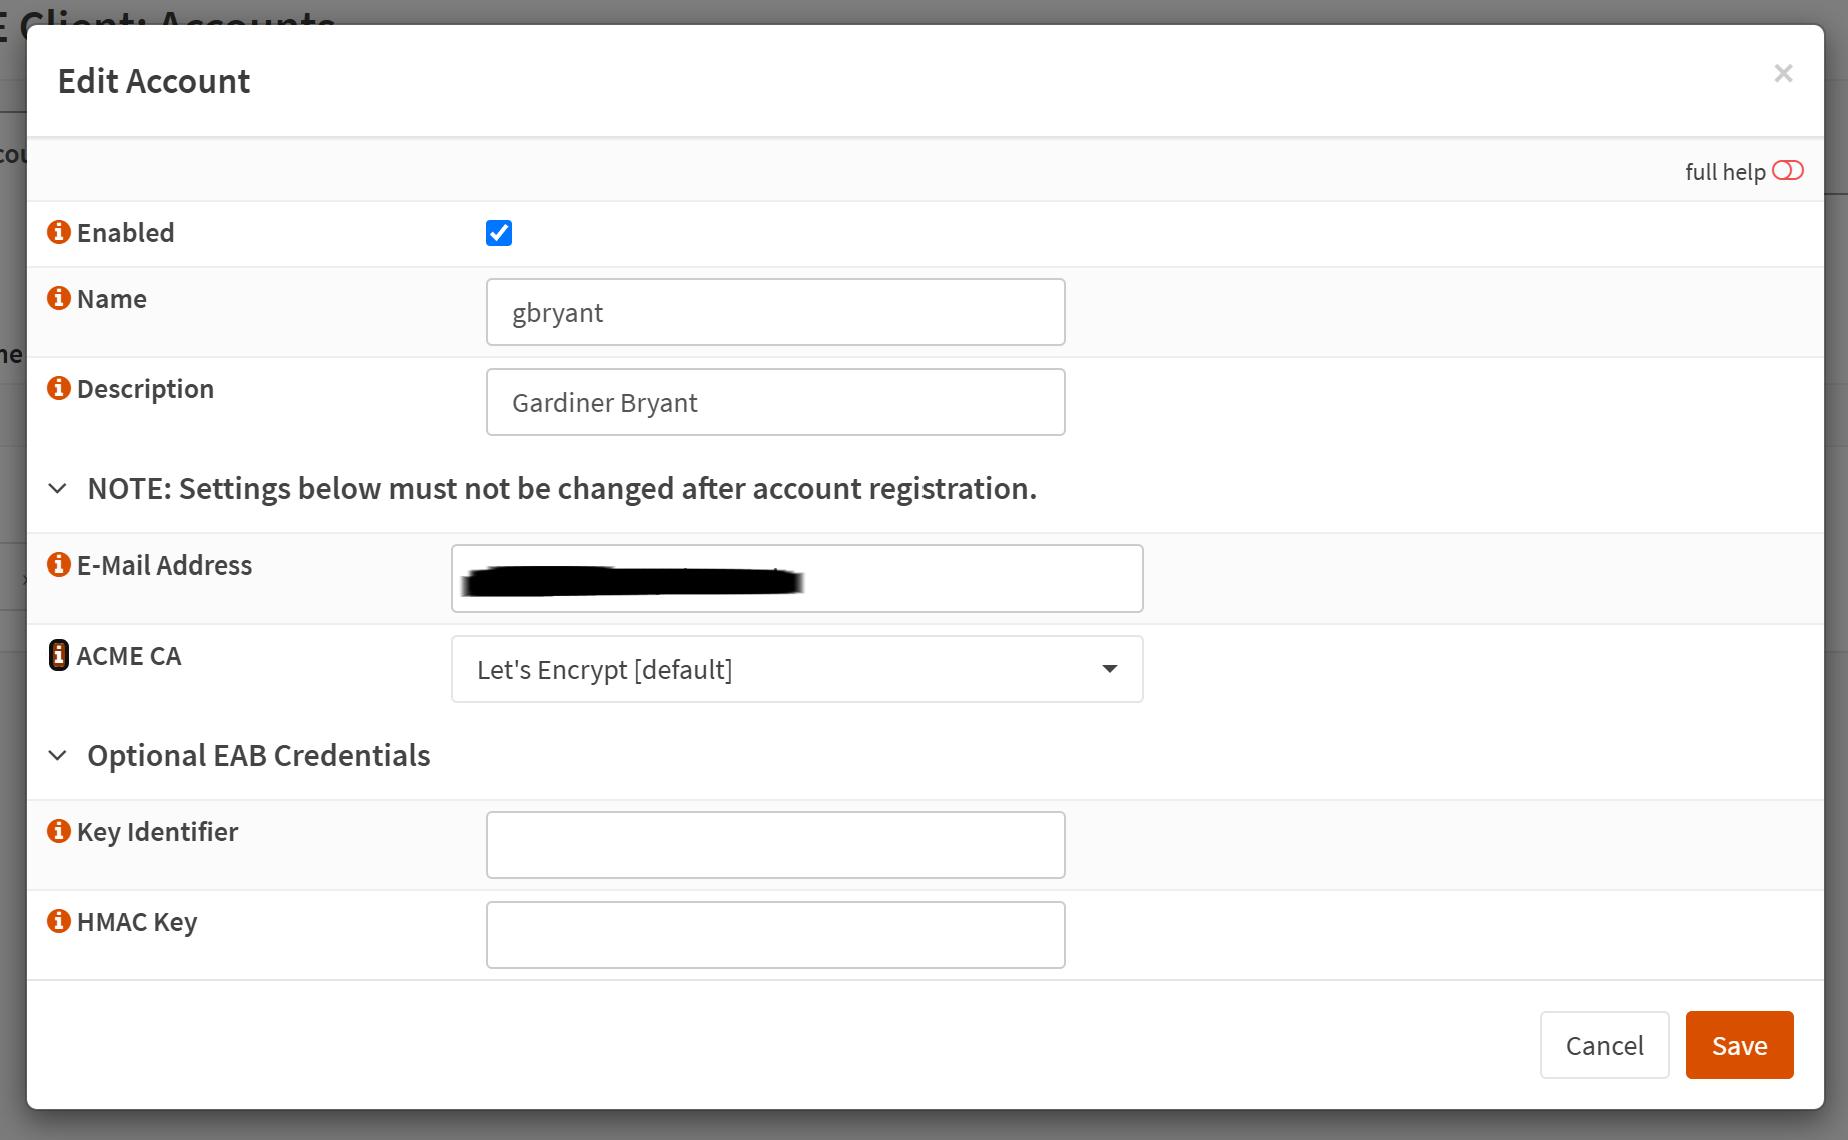
What we're doing here is specifying which Certificate Authority we want to use to sign our TLS encryption certificates.
- Give this Account a name
- Provide a valid email address
- Select
Let's Encryptin the ACME CA field.
2.b – Create Challenge Types
Then under Services → ACME Client → Challenge Types we need to add a new Challenge Type.
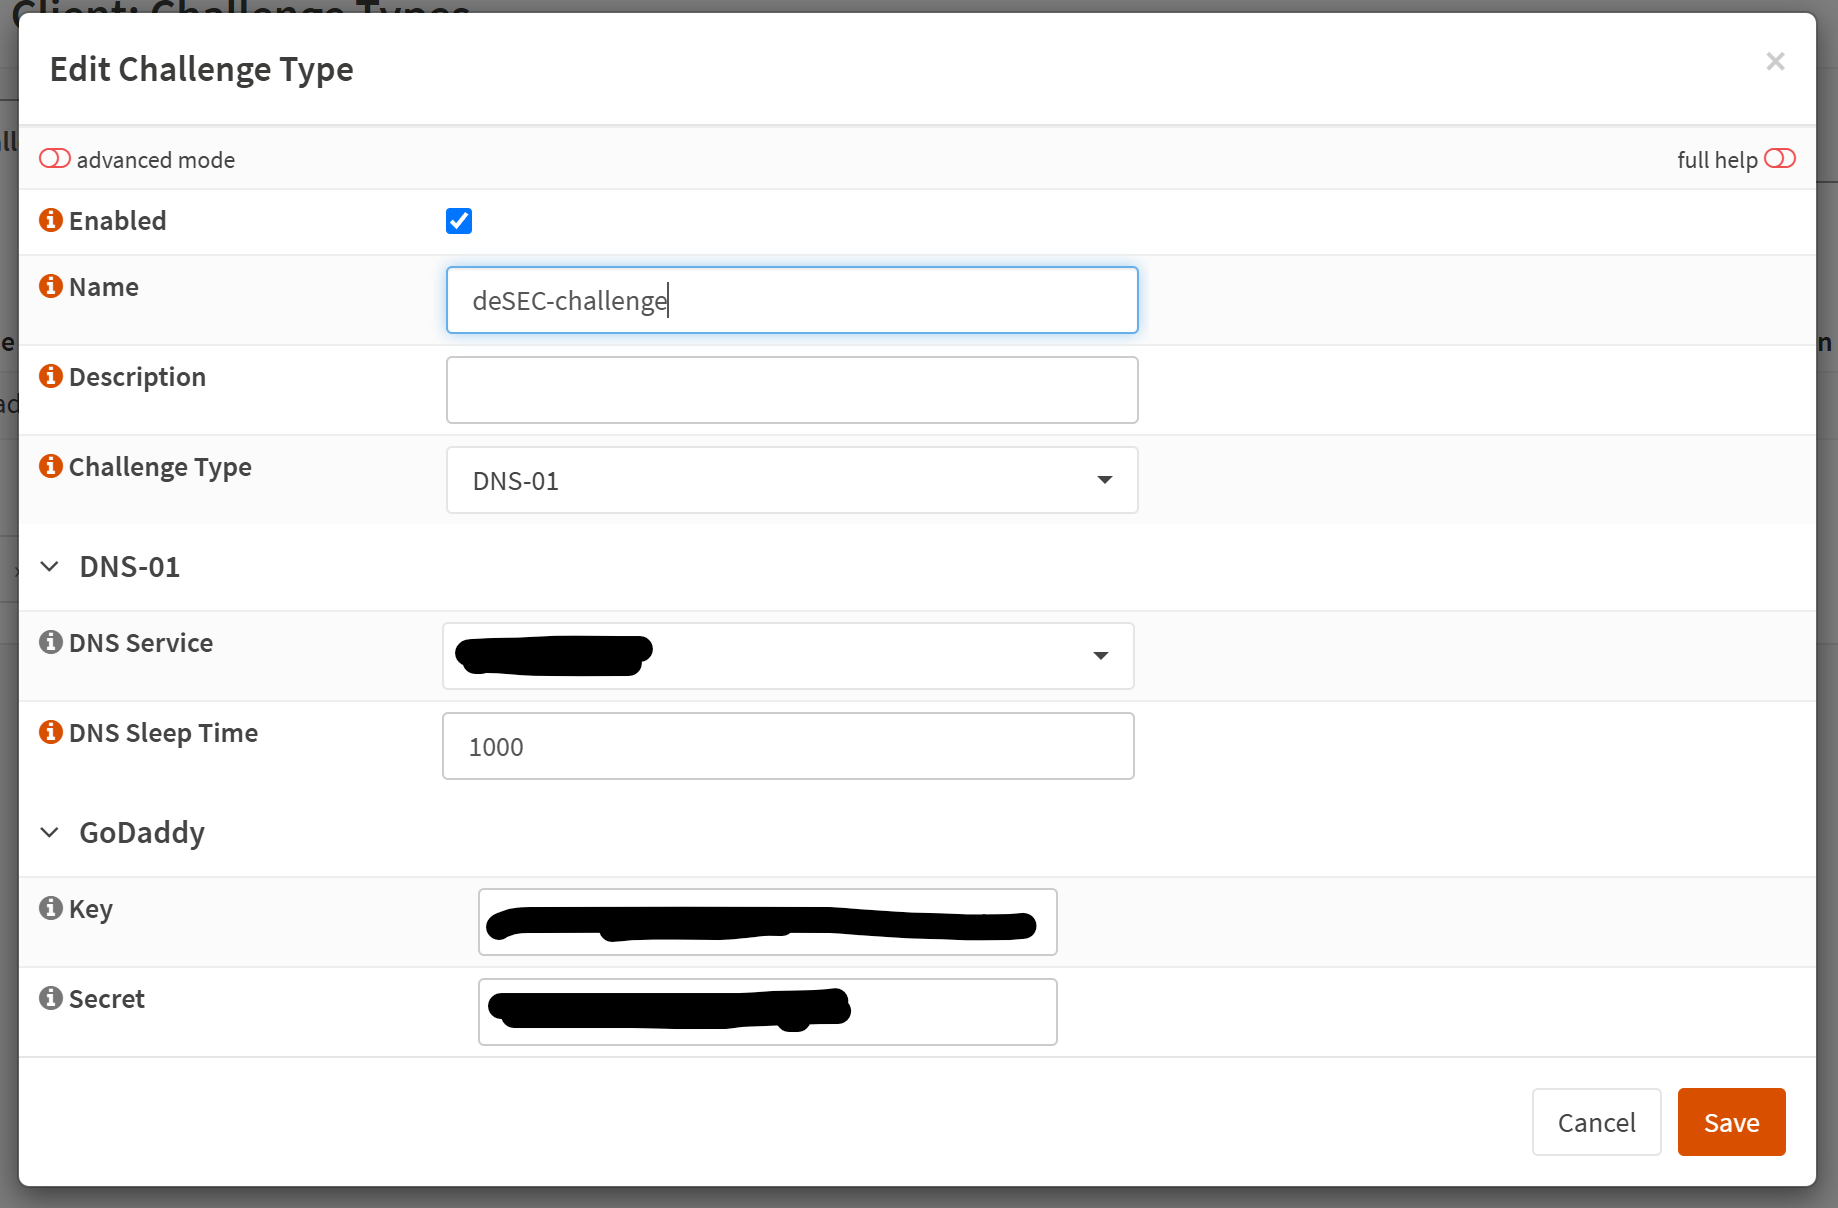
Here, you're going to want to select DNS-01 for the Challenge Type field.
Then select the DNS service that your domain is using. For example, in this case I bought my domain through Godaddy and I'm using their default nameservers for this particular domain. I was using Linode's nameservers but had issues when it came time to provision new certs, so I moved the domain back to Godaddy.
Each provider will require different authentication. In the case of Godaddy, I had to provision an API key and supply the key and the secret to the appropriate fields in this step.
tt2.c – Create Certificates
Next, let's create our certificates Services → ACME Client → Certificates and add a new certificate.
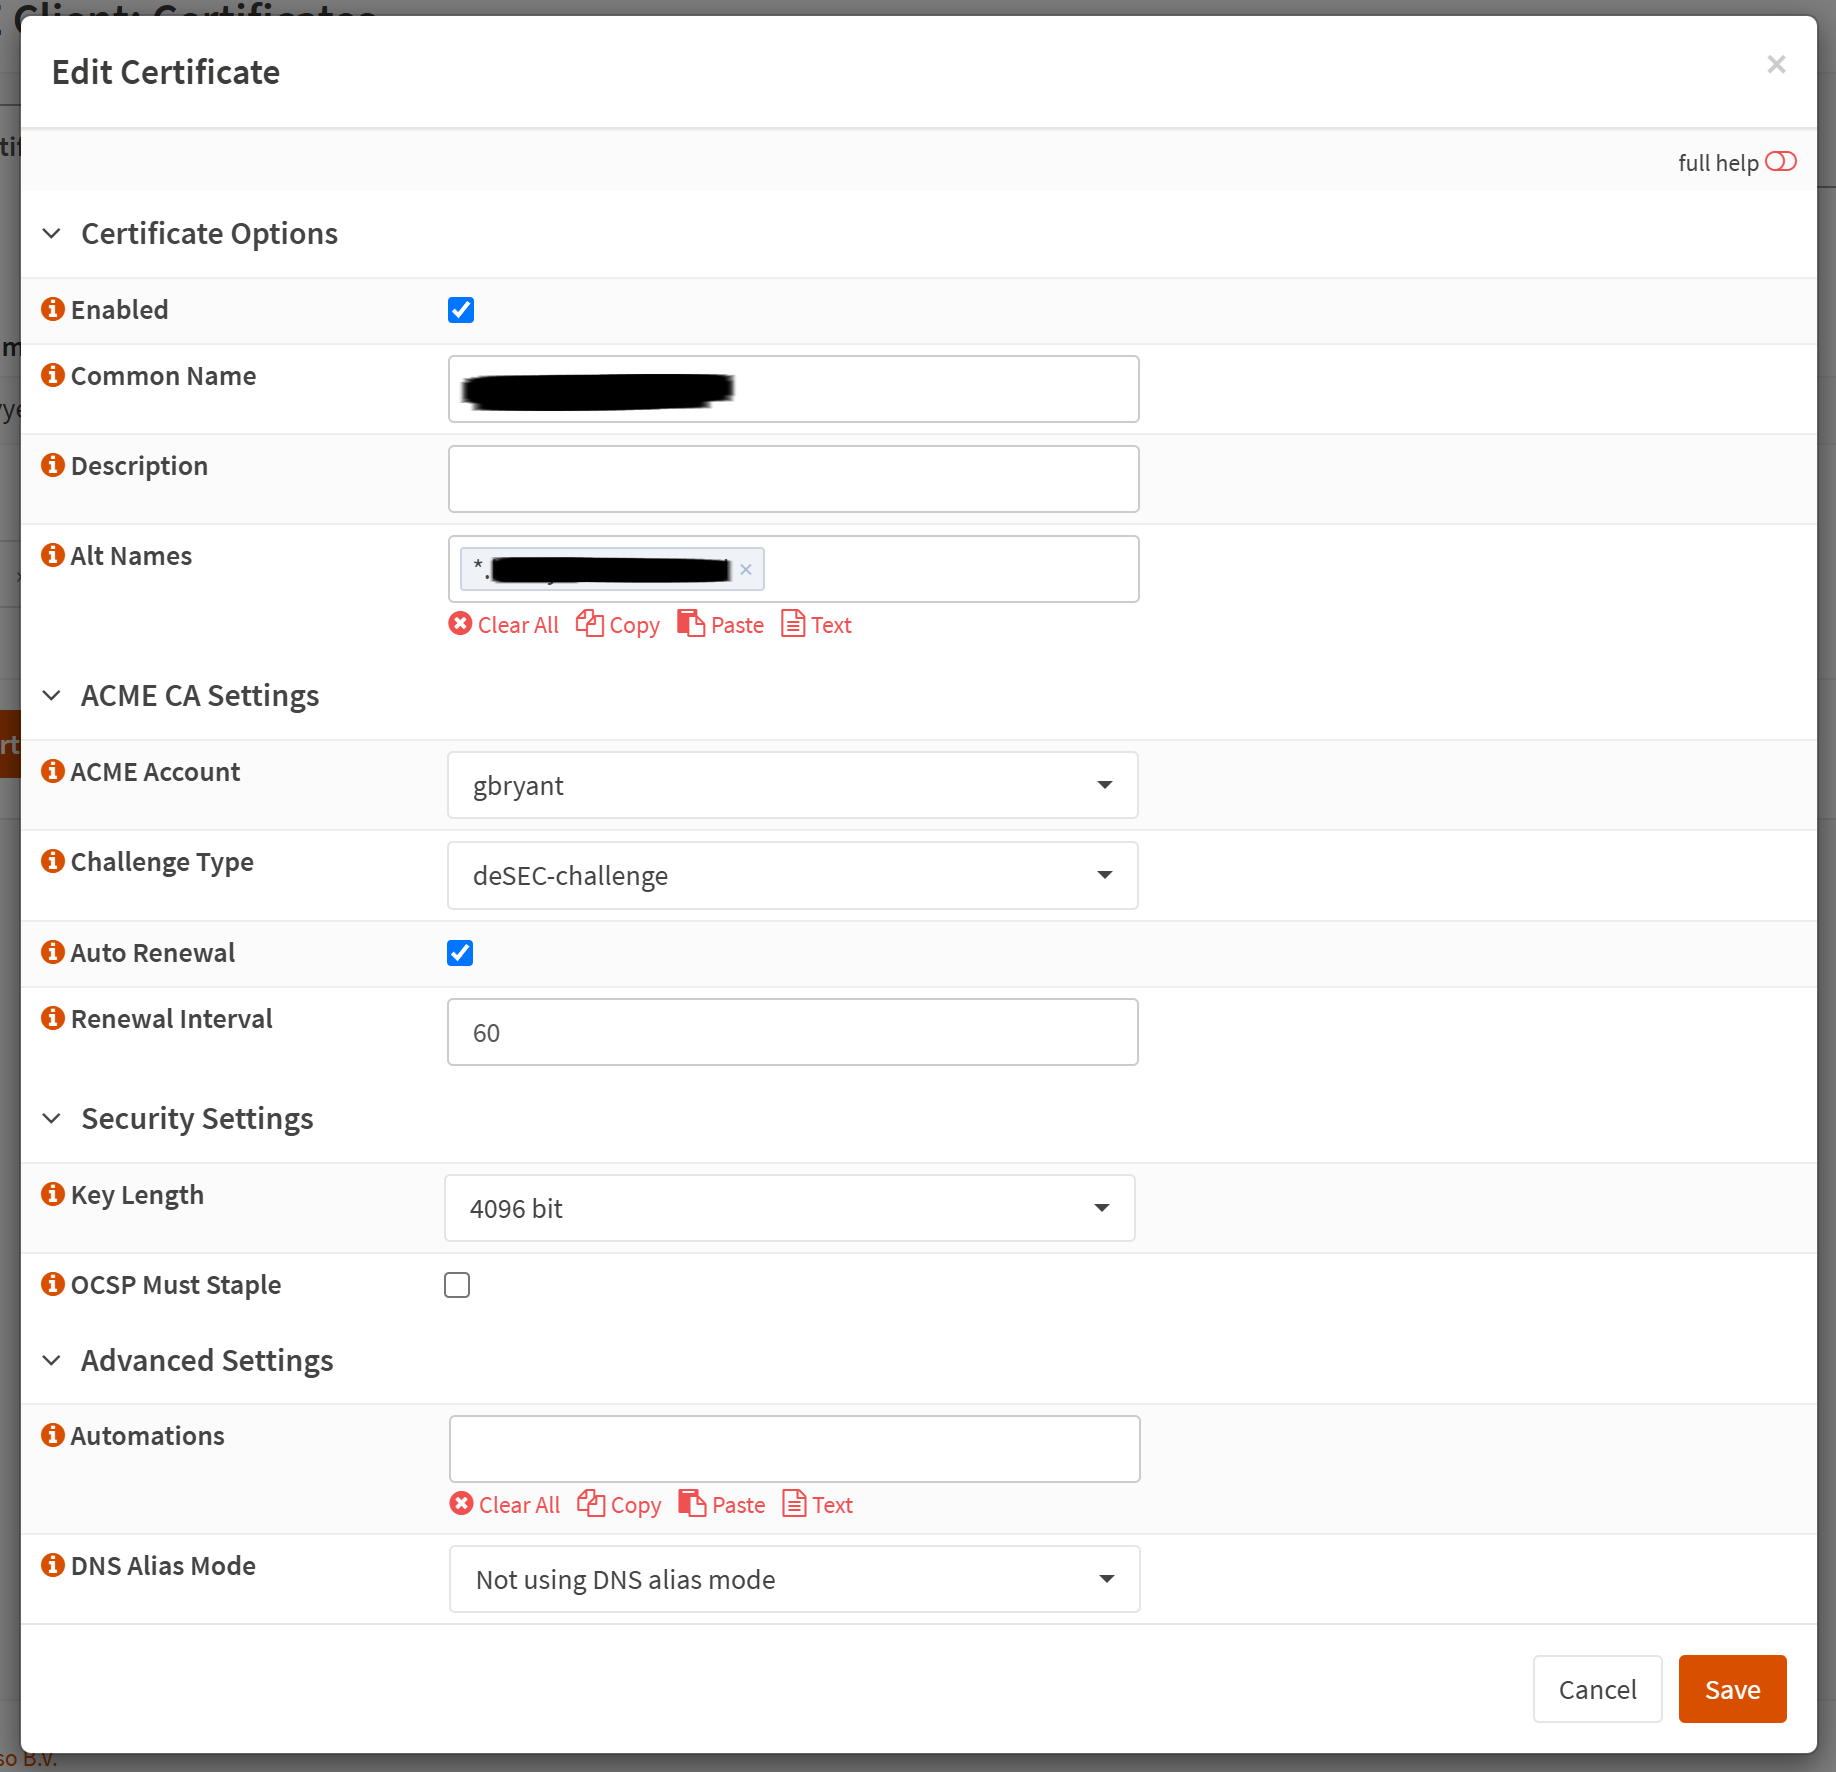
Put your domain name in the Common Name field. If you want to also add wildcard subdomains (which I highly recommend you do), you can use *.example.cloud in the alt names. Otherwise, you can specify individual subdomains here.
Great! Now click Save.
At this point, we need our cert to be created so click the refresh button on the left side of the listing. This will force the certificate to be created.

Assuming your DNS settings are correct, your certificate should be signed and ready to go once the DNS Sleep Time has elapsed.
3 – Install & Configure nginx
Let's go back to System → Firmware → Plugins and let's install the os-nginx plugin.
3.a – Nginx Server
Next, we'll head to Services → Nginx → Configuration and then go to the Upstream tab. Click the + and specify the local IP address of the server you'd like to expose in the Server field.
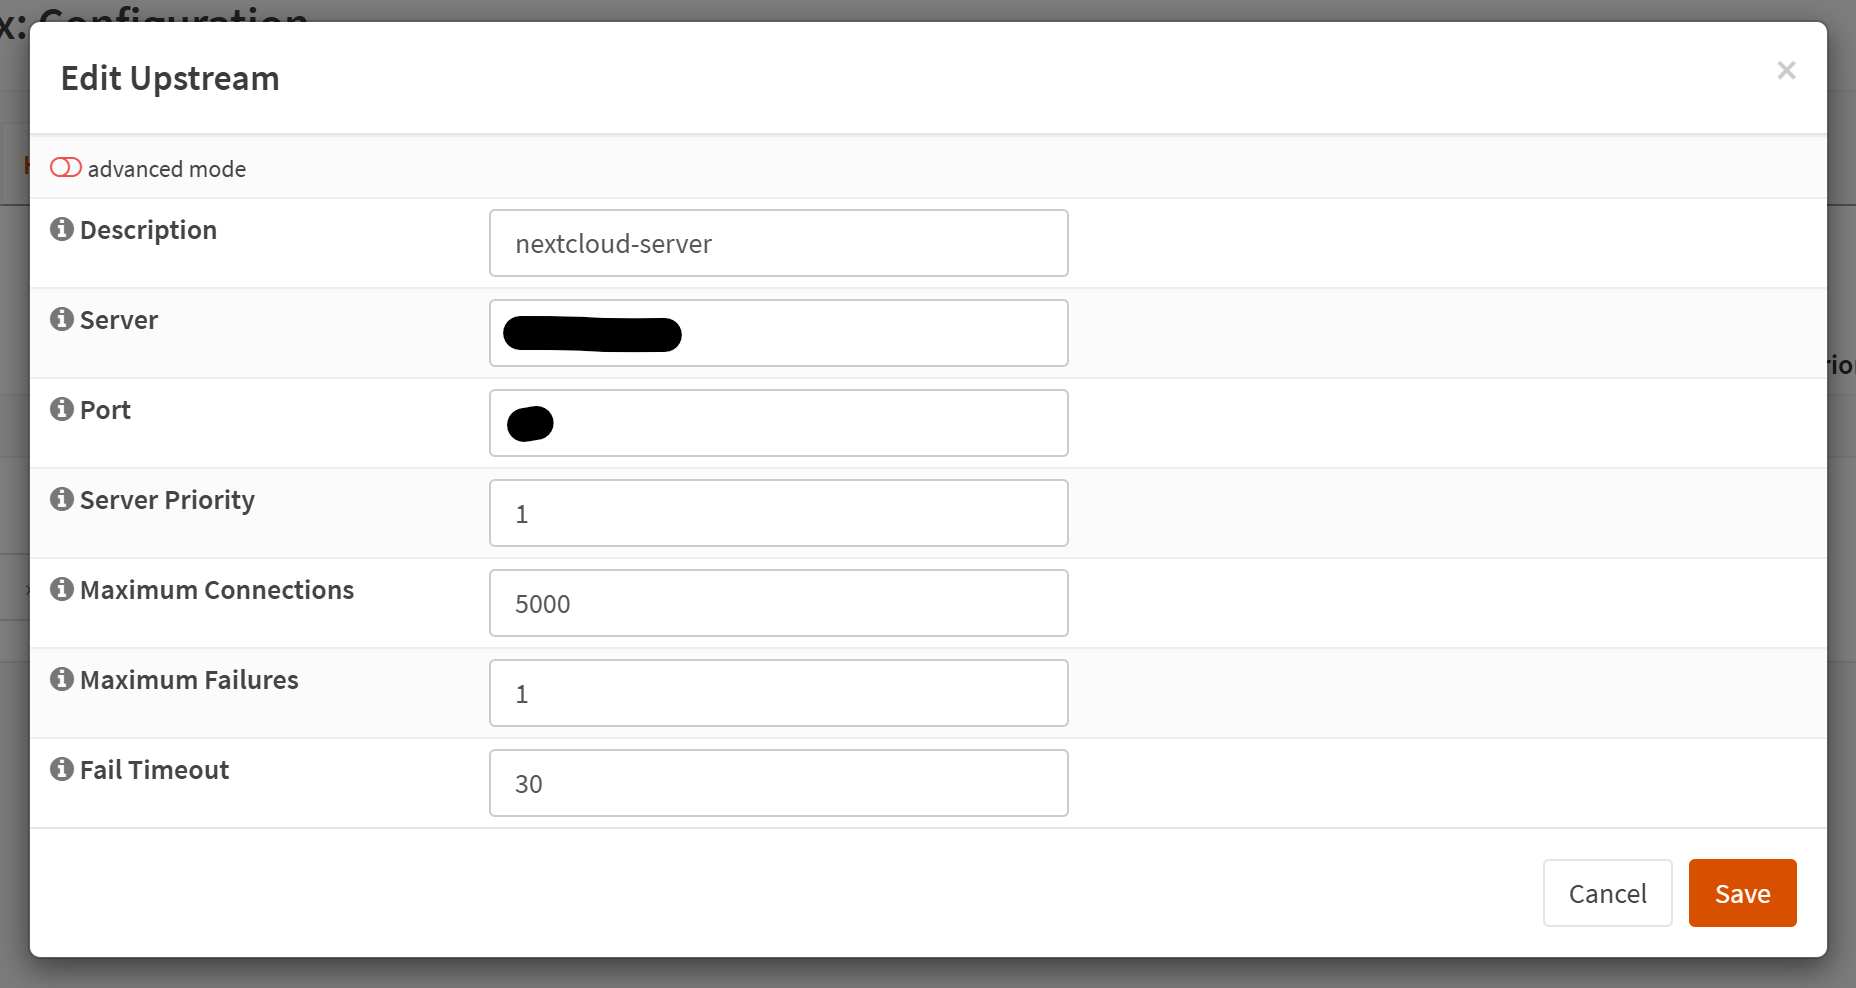
You'll also want to specify the port number your service is listening on in the Port field.
I'm using the other settings based on my previous setup. You may not want to allow 5000 connections here. You may not have the memory or bandwidth to support it.
3.b – Nginx Upstream
Next, let's click the arrow on the Upstream tab and select the Upstream option.
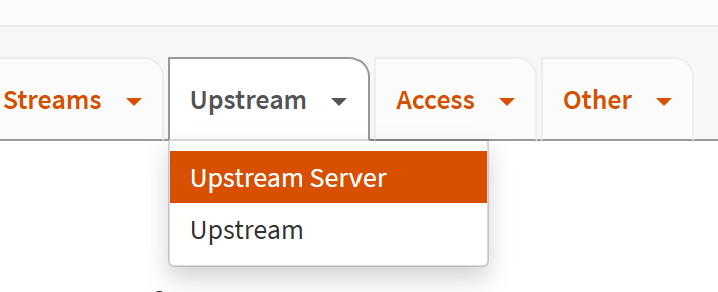
Add a new item:
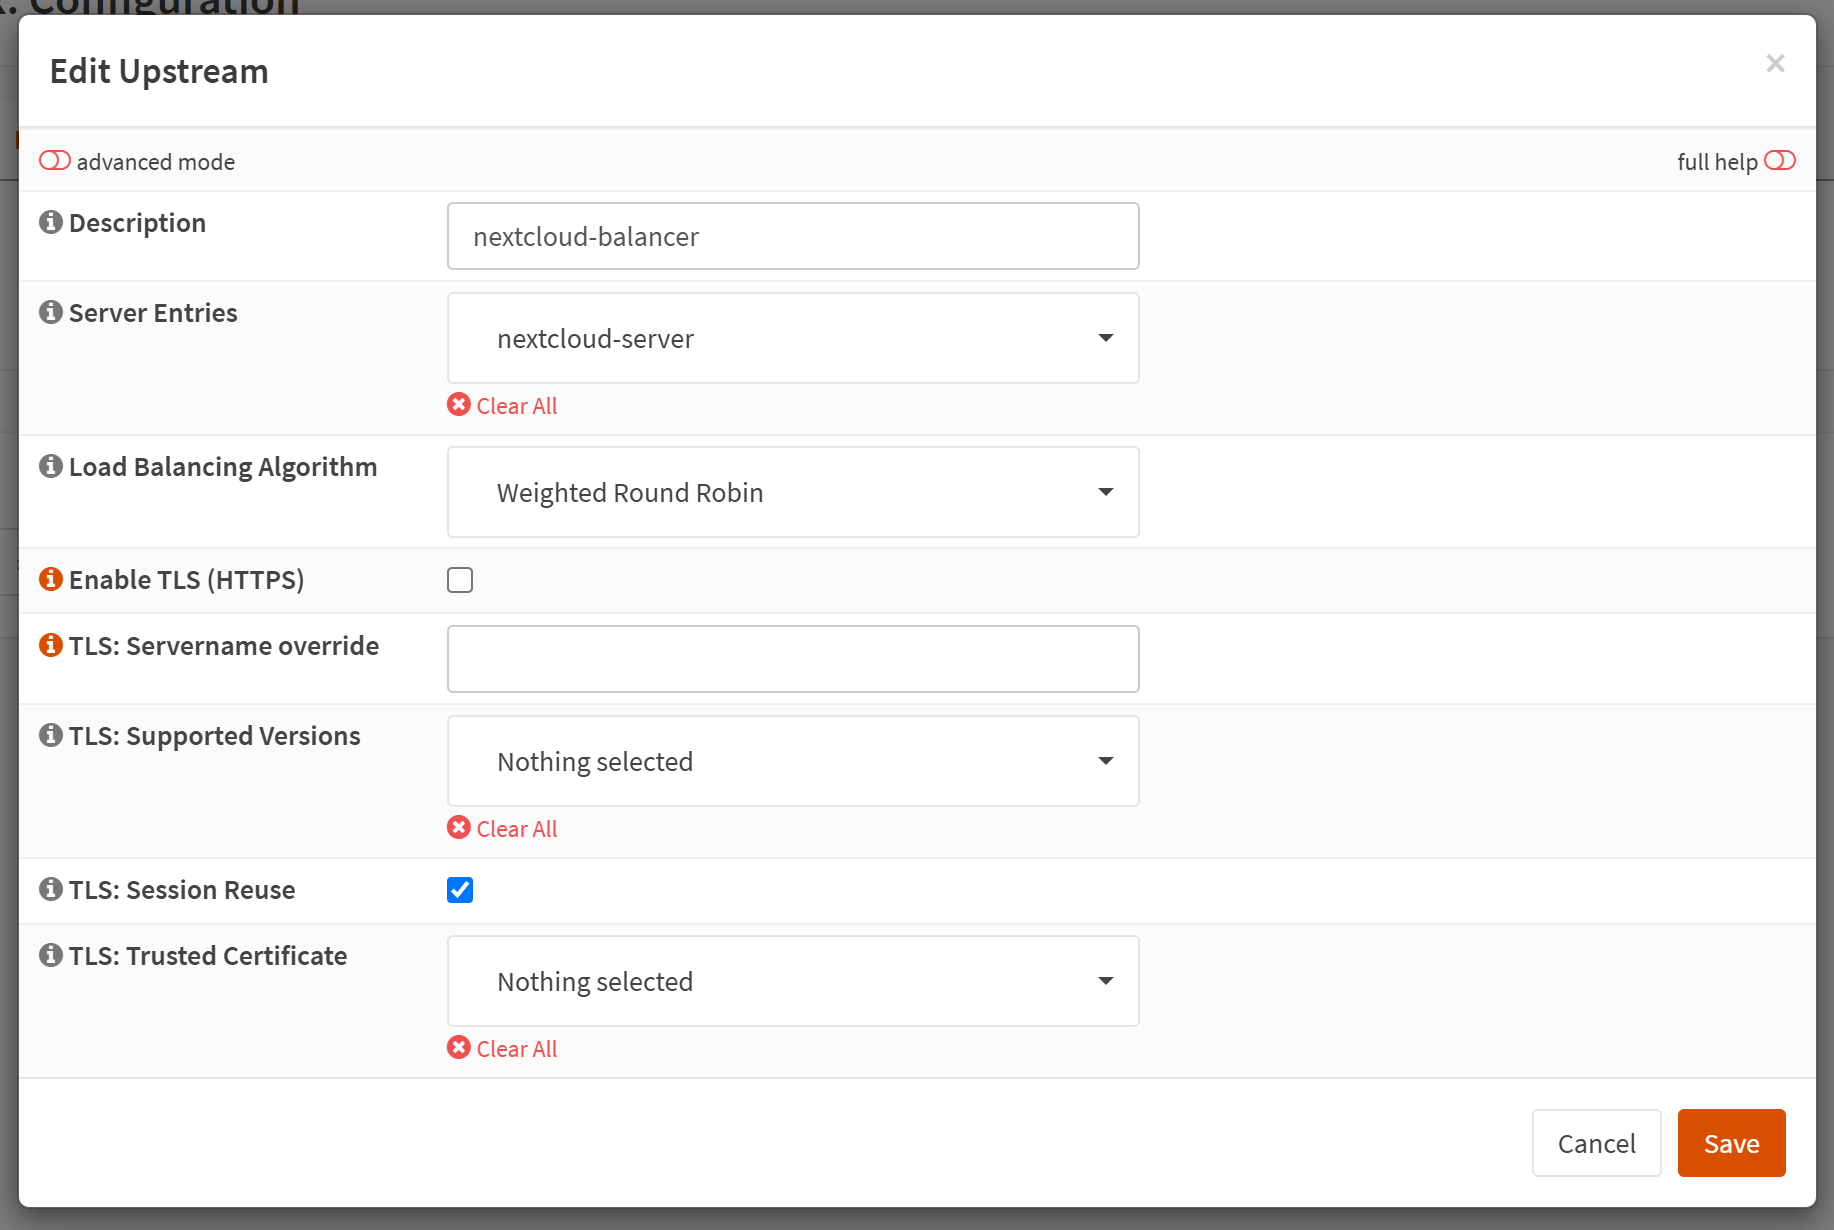
On this page, all we need to do is specify a Description and select the Upstream Server we just created under the Server Entries field.
3.c – Nginx Location
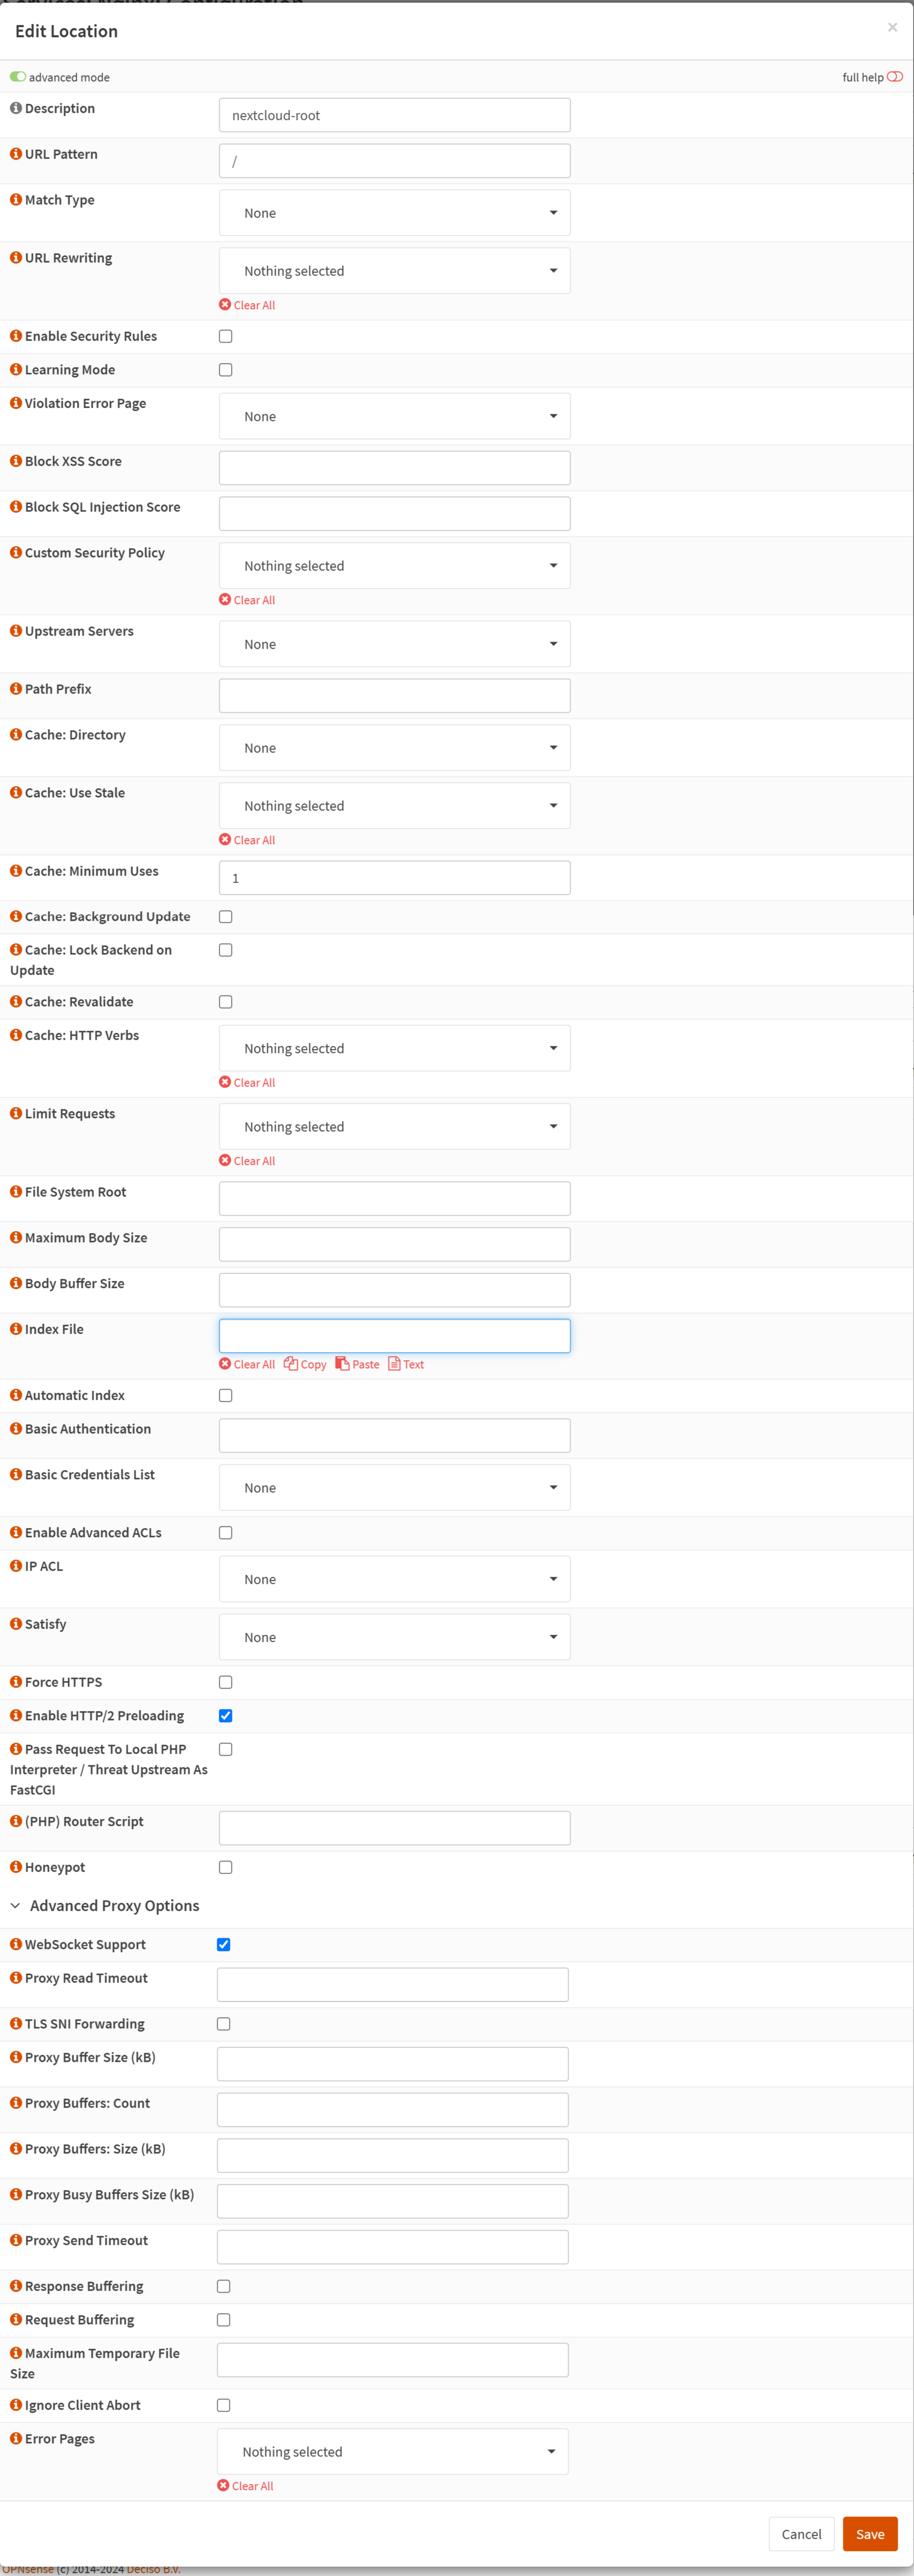
Next, let's click the arrow on the HTTP(S) tab and select "Locations." Then, let's create a new entry with the + button.
For the most part, all you'll need to change here is:
- The Description field (can be anything)
- The URL Pattern field set to
/- If you need to, you can specify the URL pattern to any valid RegEx. This is relative to the URL path.
- Then, finally, you should set the Upstream Server to the one we just created in the last step.
See my full configuration settings.
3.d – Nginx Domain
Finally, let's go to HTTP(S) tab → HTTP Server and create a new entry with the + button. This is where we put it all together!
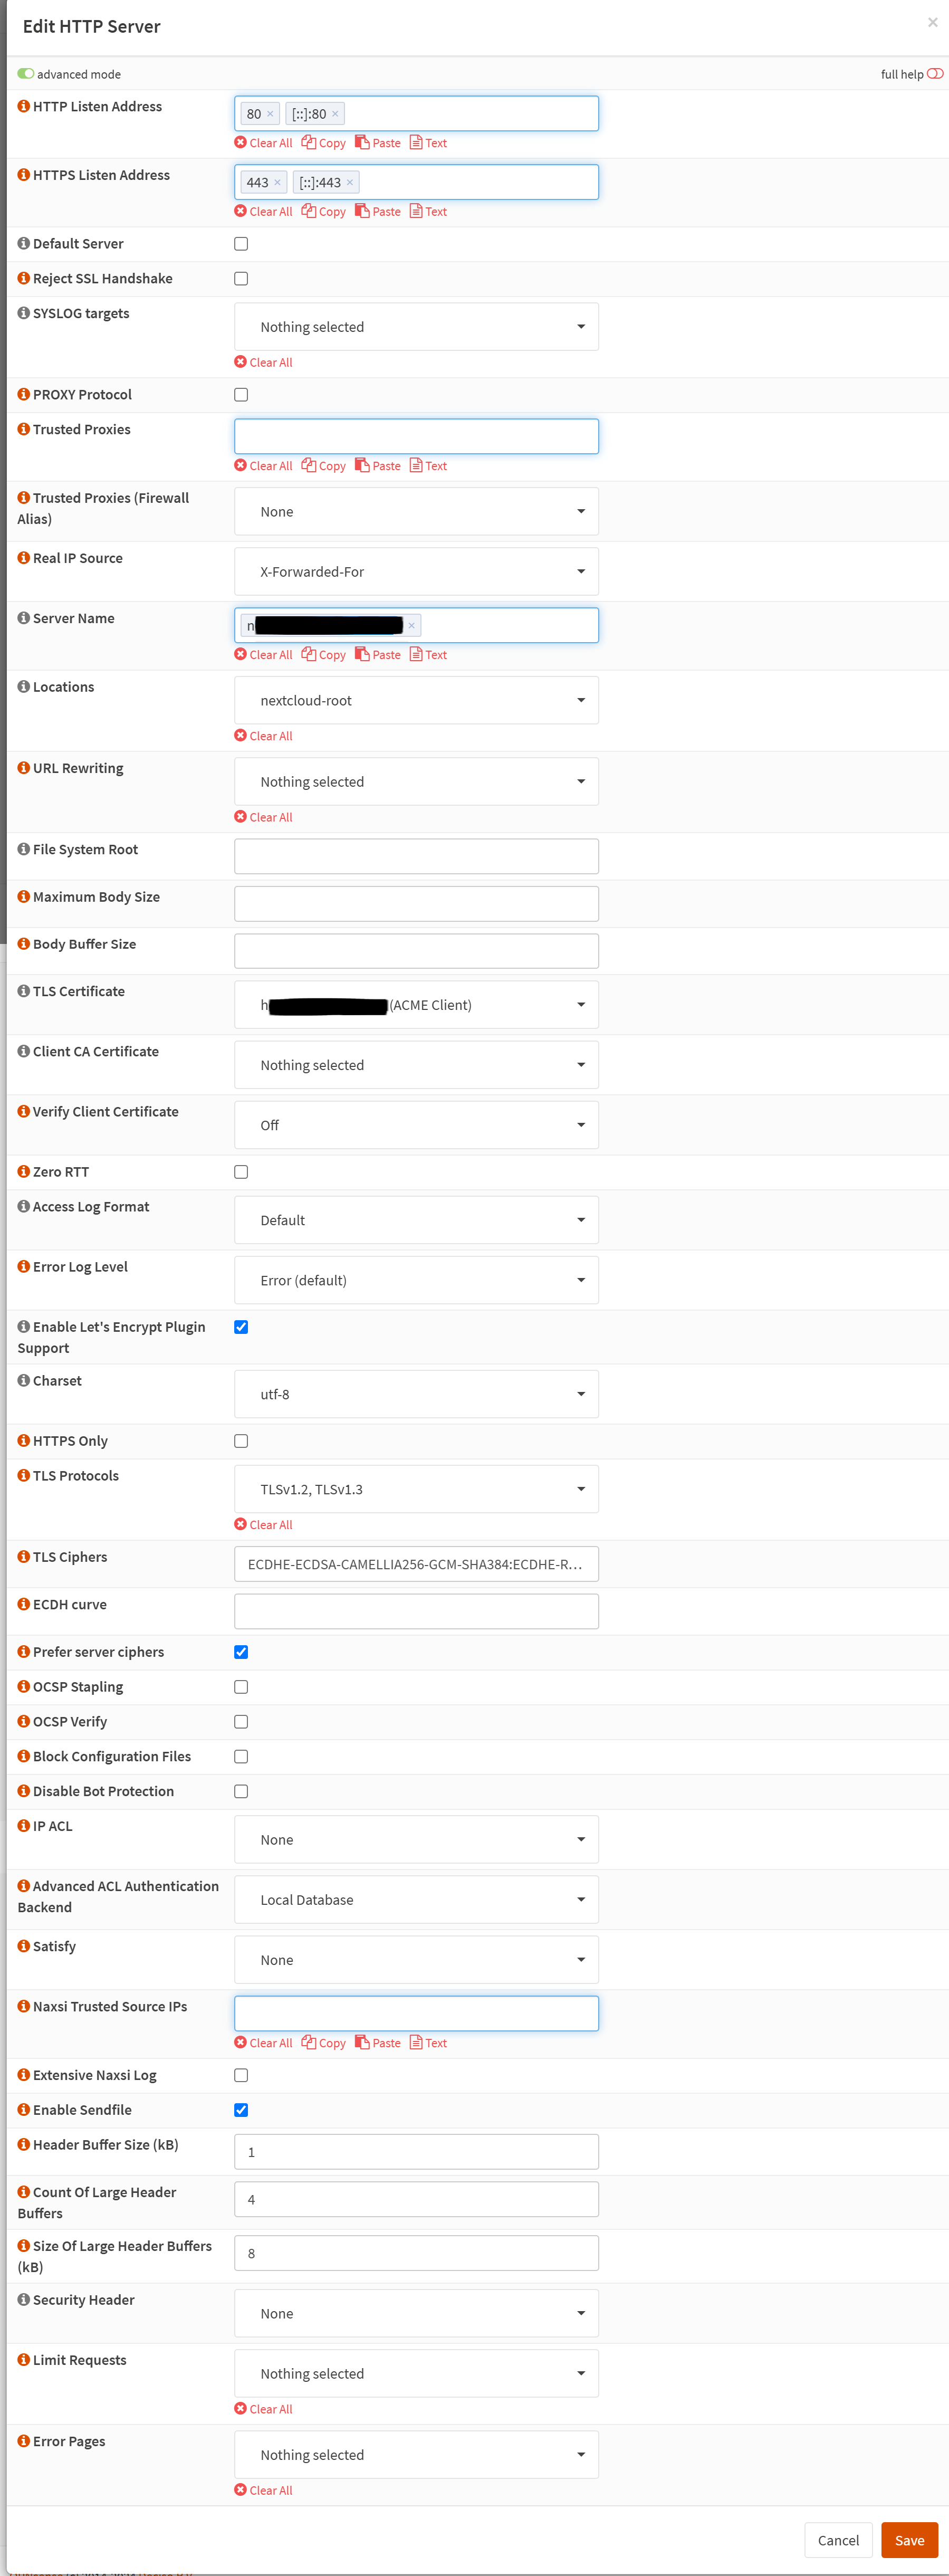
In the Edit HTTP Server modal, we need to check the advanced mode toggle in the top left. Then, let's scroll down. For our purposes (setting up a reverse proxy for Nextcloud), we need to change the following fields:
- The Real IP Source field should be set to
X-Forwarded-For.- This might differ for your server/application.
- The Server Name field should be set to either the
Common Nameor theAlt Namethat we specified in the 2.c – Create Certificate step. - The Locations field should be the set to the location we set up in 3.c – Nginx Location.
- The TLS Certificate should be set to the certificate we set up on step 2.c – Create Certificate.
See the full configuration here.
You're done!
If you add more services at other subdomains, you can repeat step 3 as many times as you want! If you'd like to add more domains, you can follow steps 2 and 3 to add them!
This is such a flexible setup and allows you to create as many domains/subdomain and certificates as you need!