
Get started with Original Xbox emulation on the Steam Deck
If you're like me, then you probably have extremely fond memories of playing the original Xbox. From Fusion Frenzy to Halo, Ninja Gaiden, Tony Hawk, and even Conker: Live & Reloaded—the fact is, Xbox had some real classics. Today, we're going to review how to get Xbox emulation up and running on your Steam Deck so that you can relive those glory days on your favorite handheld! Let's get started.
Step 0: Get Started with EmuDeck
The first thing you'll want to do is decide how you want to access your games. Personally, I prefer having all of my games in my Steam game library. To achieve this, you can use the simple EmuDeck utility to handle all of the heavy lifting for you. Suffice it to say, EmuDeck will take care of installing Xemu for you—which is the emulator we'll be using—and will get you set up with everything else too. But we'll get to that later.
There's also the option of getting your hands dirty and doing all of the configuration yourself. You can download the Xemu emulator from the Discover app center and that should get you started. Everything in this tutorial should be applicable whether you choose to install Xemu manually or by using EmuDeck. However, to keep things simple, we're going to be focusing on the EmuDeck method in this post.
Now, I wrote another article about how to get started with EmuDeck, so you should probably check that out if you haven't got that set up already on your Steam Deck.
A Note on Your Emulation Path
Before we continue, you can choose to install EmuDeck on your SD card or on your internal storage. In this tutorial, I’ve actually installed EmuDeck on my SD card. If you’ve opted for the internal storage, then the path to the emulation directory should be /home/deck/Emulation. Otherwise, the path should be /var/run/media/mmcblk0p1/Emulation.
Step 1: Configure Your BIOS Files
Now that we have EmuDeck installed and all that other stuff out of the way, you'll want to copy over your BIOS files. I can't tell you where to get these files from, except to say that you can rip them from a modded Xbox or from the Internet.
Now, the question is: where should you copy these files to? I chose to place them on my SD card under the Emulation/BIOS directory in a folder called Xbox BIOS. It doesn’t matter what the directory is called as long as you can find it.
You might be asking, how did I copy these files to my Steam Deck? Well, I have my ROMs and BIOS files on my home server. I’ve logged into that from my Steam Deck—I’ve got over 100 terabytes of storage as part of my homelab so I don’t have to worry about that too much data.
If you’re unsure how to copy files, I’ve actually made a few videos on this very topic covering different techniques, mostly about copying files from your PC to your Steam Deck.
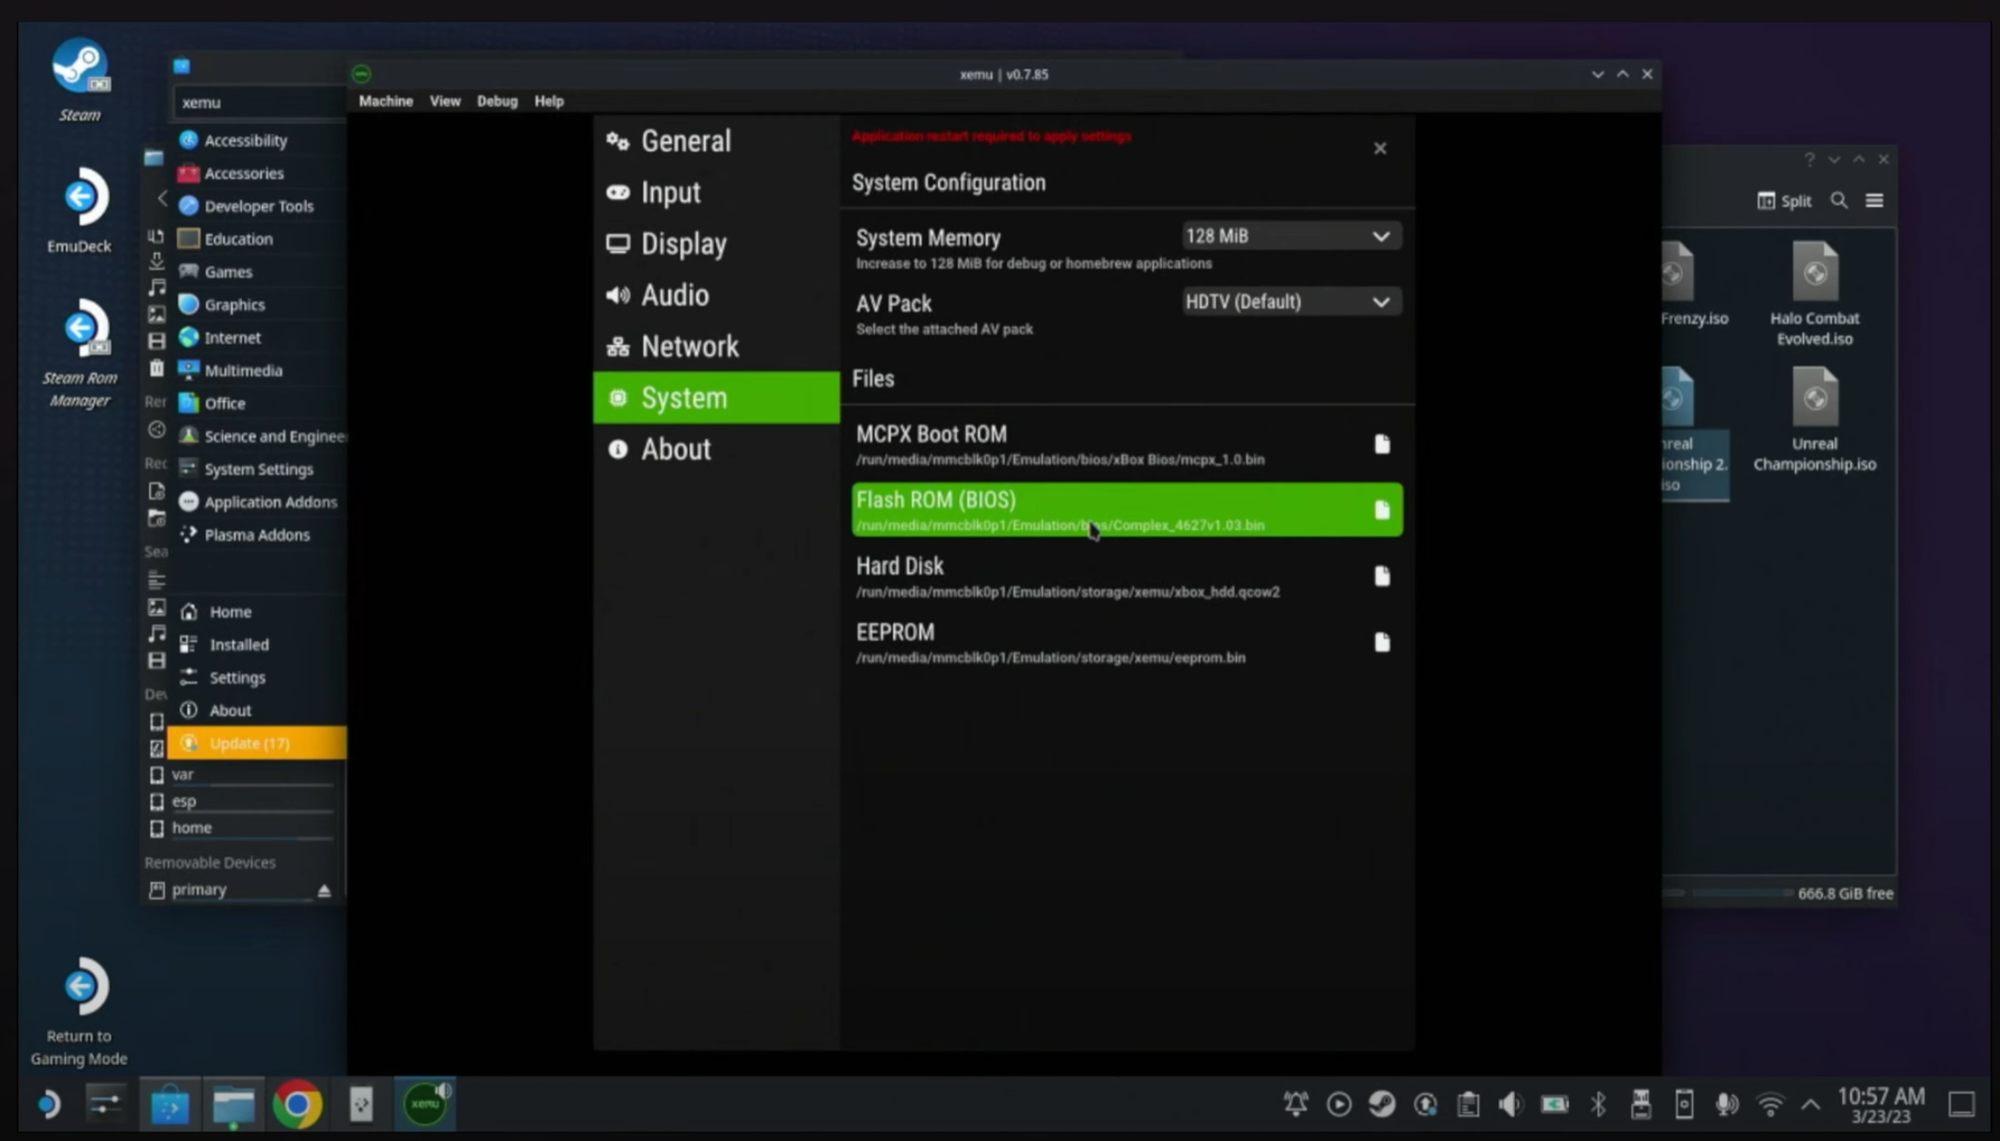
Okay, so once you’ve got your BIOS files copied over, you’ll want to set up Xemu. Open up Xemu and click Machine > System, then click the MCPX Boot ROM option and choose the corresponding file—it should be called something like mcpx_1.0.bin.

Quick Tip: Bookmark Your SD Card
Here’s a tip: if you have your files stored on your SD card, you’ll want to be able to navigate to that quickly. Click on More Locations, then click Computer, then go to /var/run/media/mmcblk0p1. This will get you to your SD card. Before you go into the mmcblk0p1 directory, right-click on it and select "Add to Bookmarks."
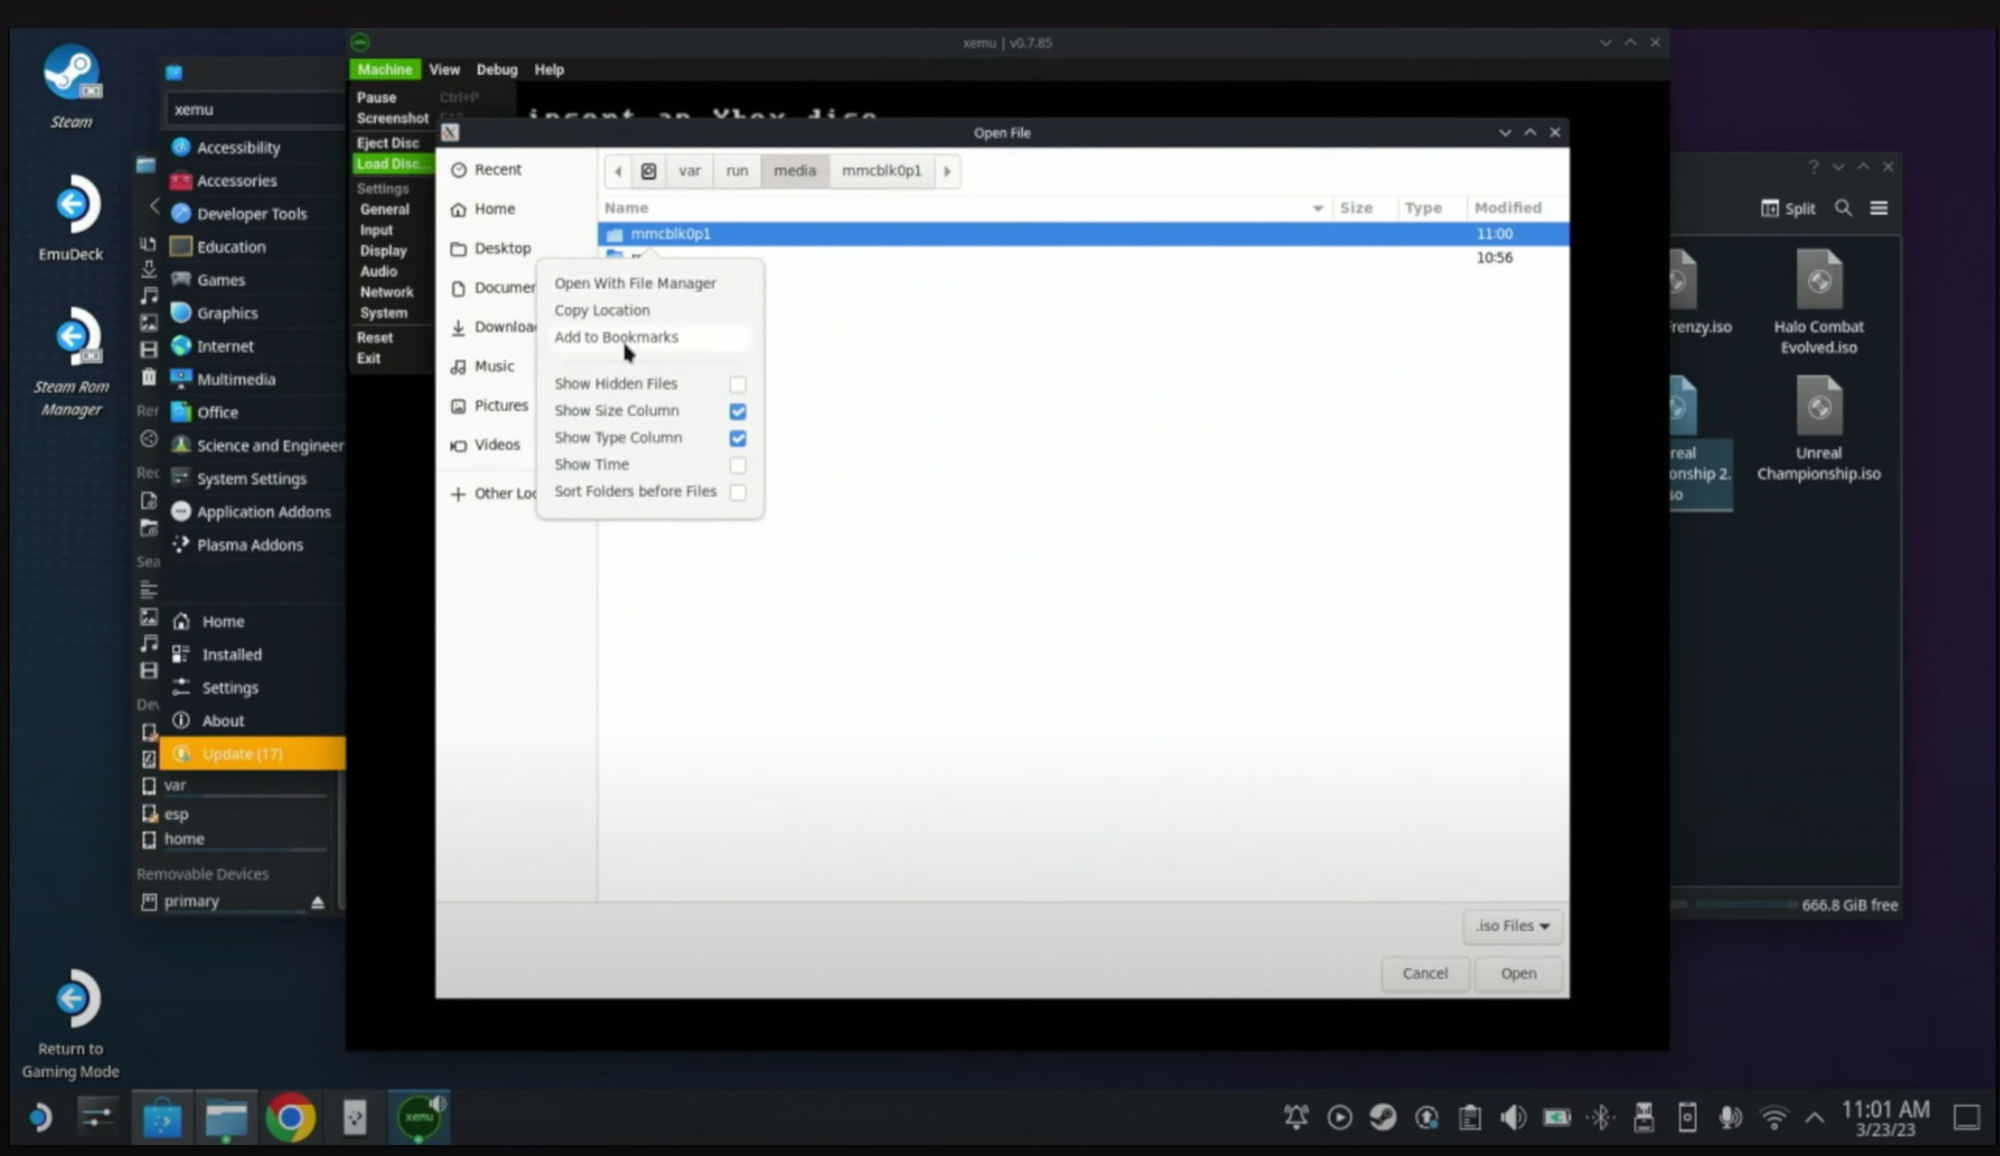
This will save the location in the left panel and help you save time.
Next, go to the Flash ROM BIOS section and choose complex_4627_v1.10.bin. Then, click Hard Disk and choose xbox_hdd.qcow2. Finally, select EEPROM and choose eeprom.bin. Each of these files—or other versions—are required to boot the Xbox emulator. Once you’ve done this, you're finished with the required configuration.
Step 1.a: Other Configuration Options
In the Display settings, you can choose the internal rendering resolution. I generally keep mine set to 2x as it makes for a crisper image.
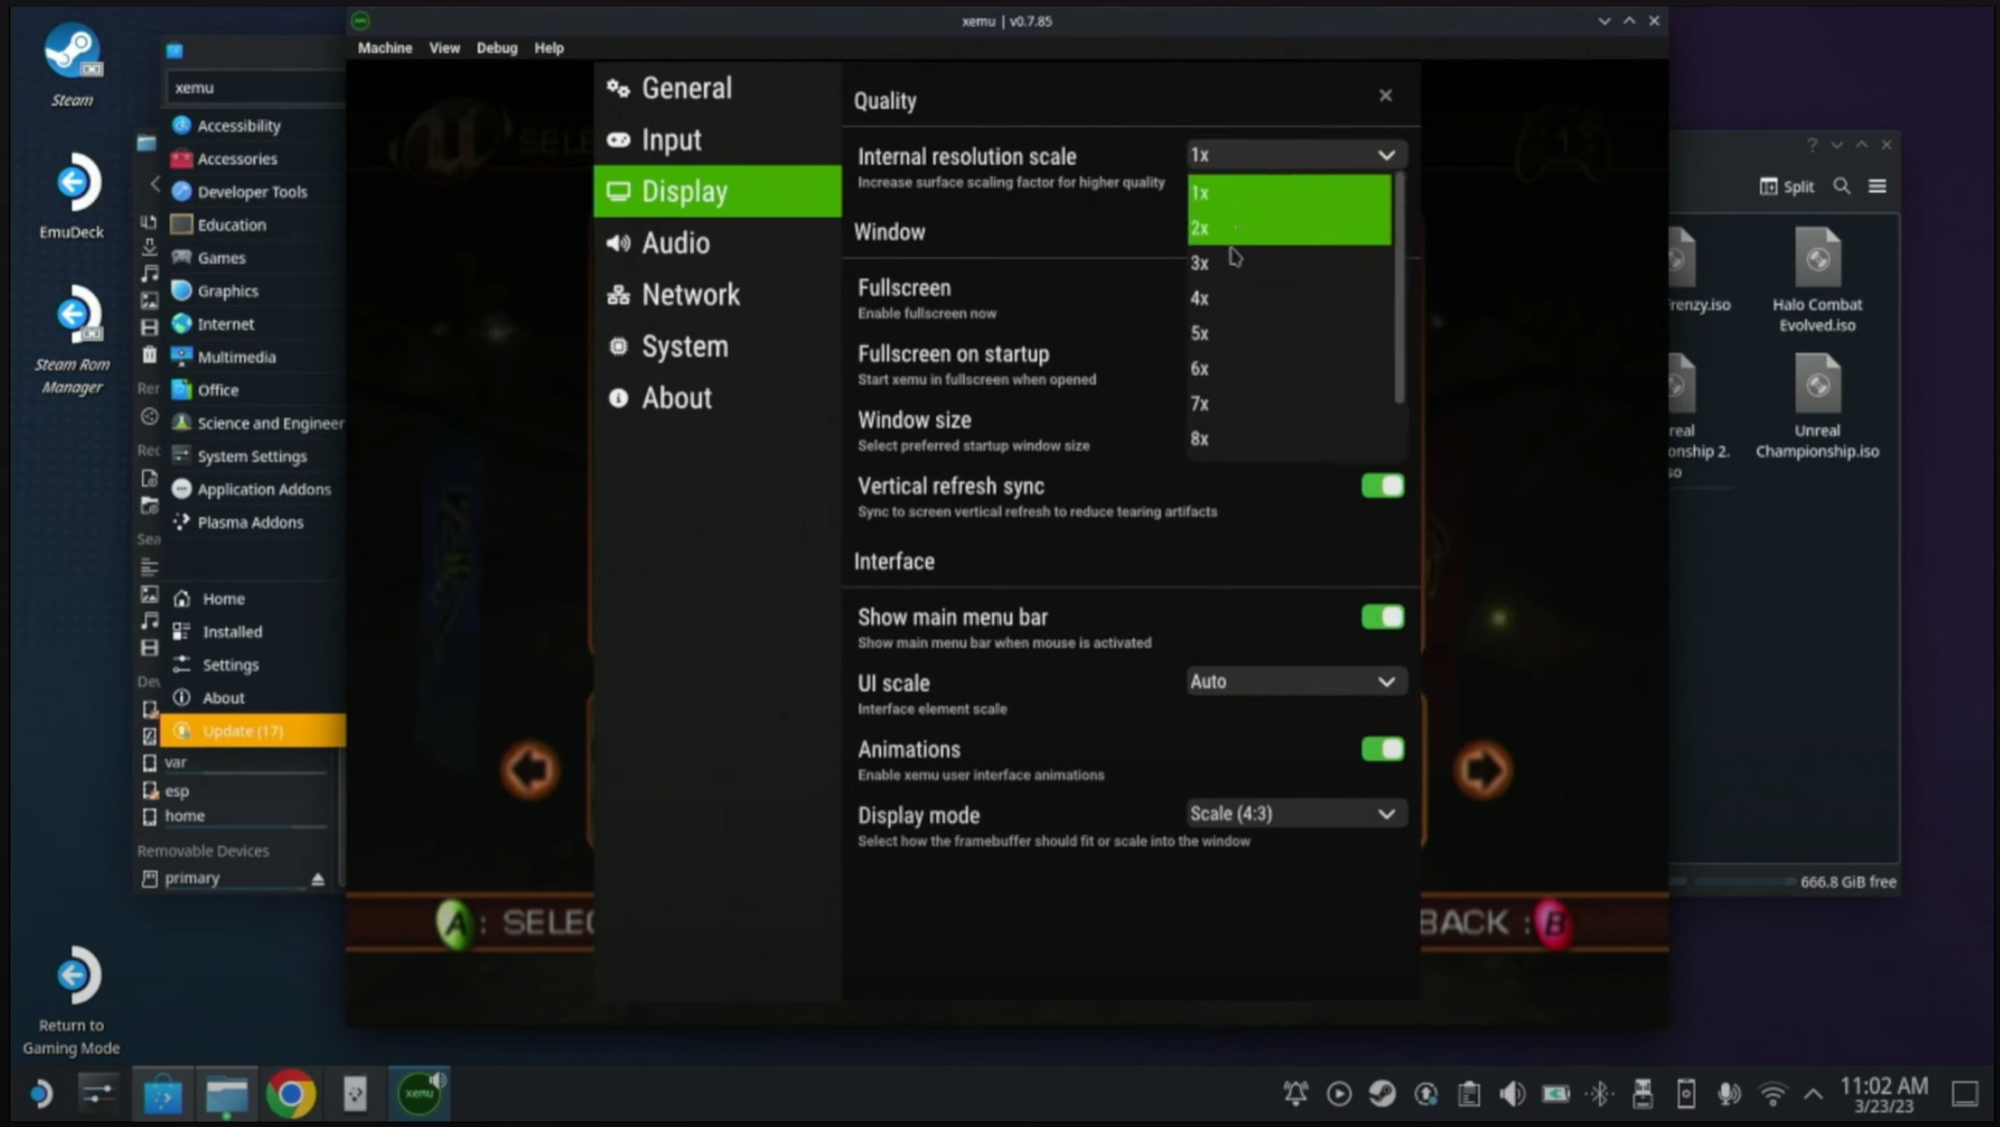
However, if you experience performance issues on the Steam Deck, setting it to 1x makes more sense. Under General, you can opt to skip the startup animation.
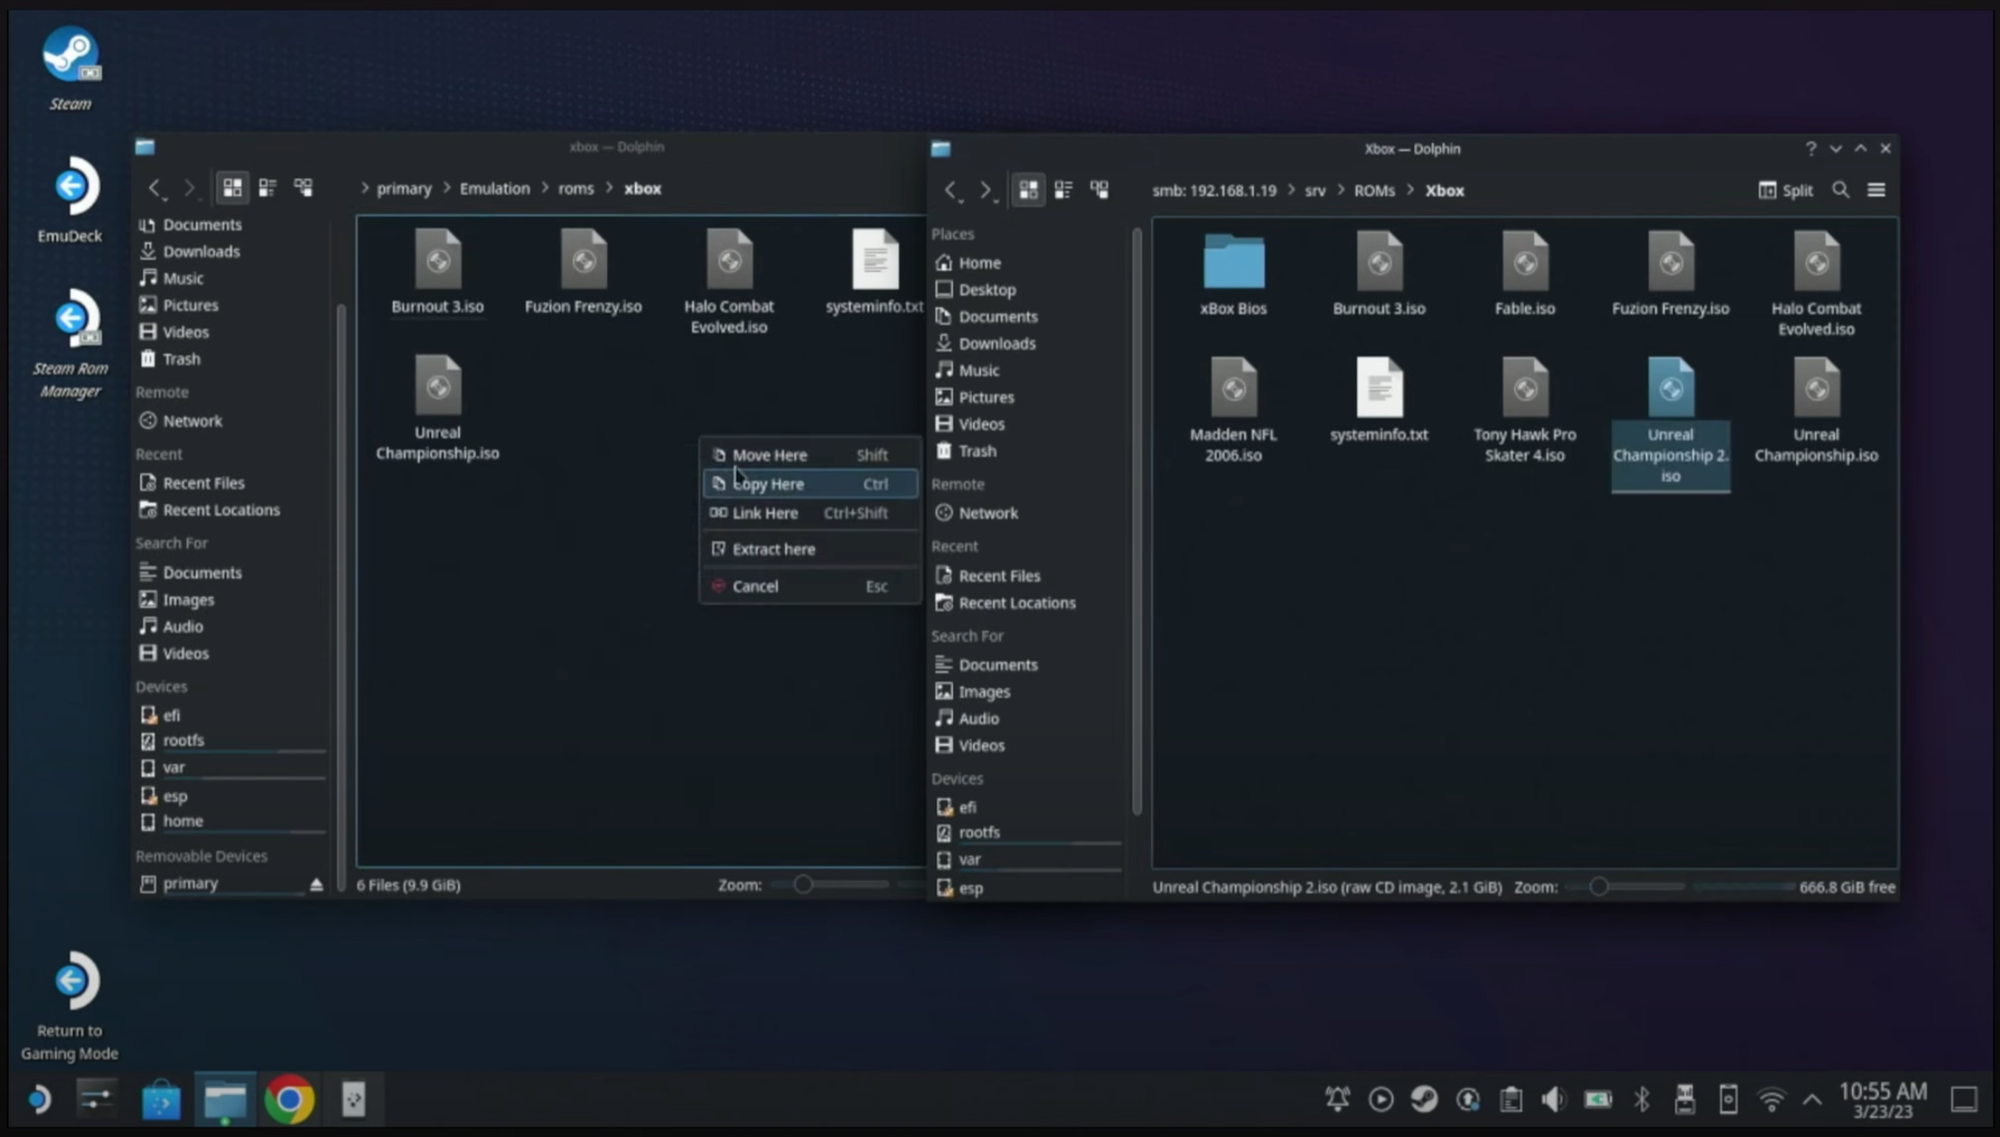
Step 2: Copy Your ISOs
Now the next most important step is copying over your ISOs. These are going to go in the Emulation/roms/xbox directory. Again, if you don’t know how to do this, you can use the links or resources I've provided to figure out how to copy files from your PC to your Steam Deck.
Step 3: Test Your Setup
Next, we need to test to see if we actually have everything set up correctly. Choose Machine > Load Disk, then navigate to the directory you copied your ISOs to and choose one of them. Click Open.
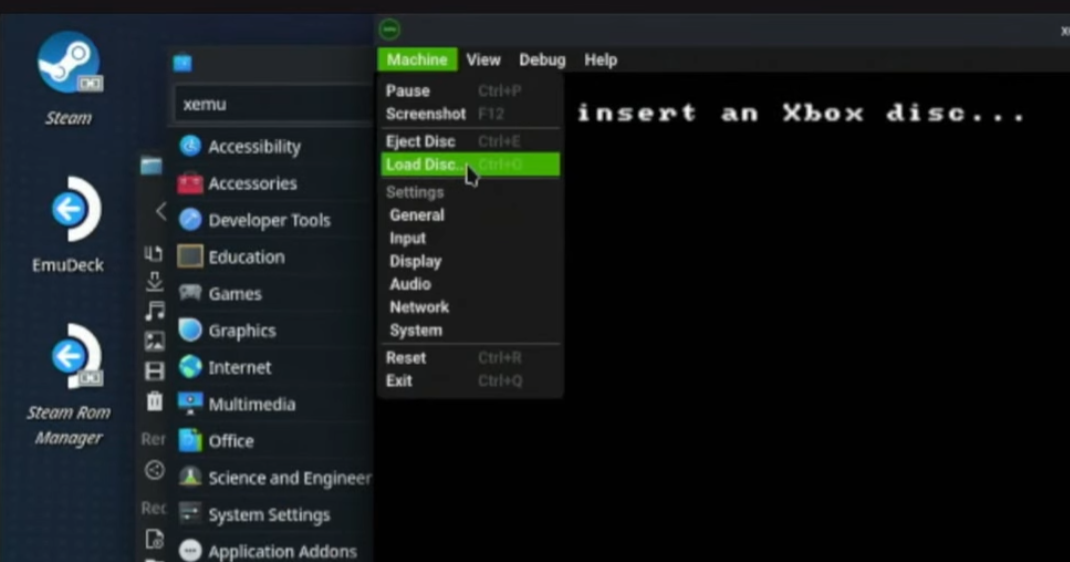
At this point, nothing should change—you should still see “Load an Xbox image.” Click Machine > Reset and then the game should boot.
Troubleshooting Steps
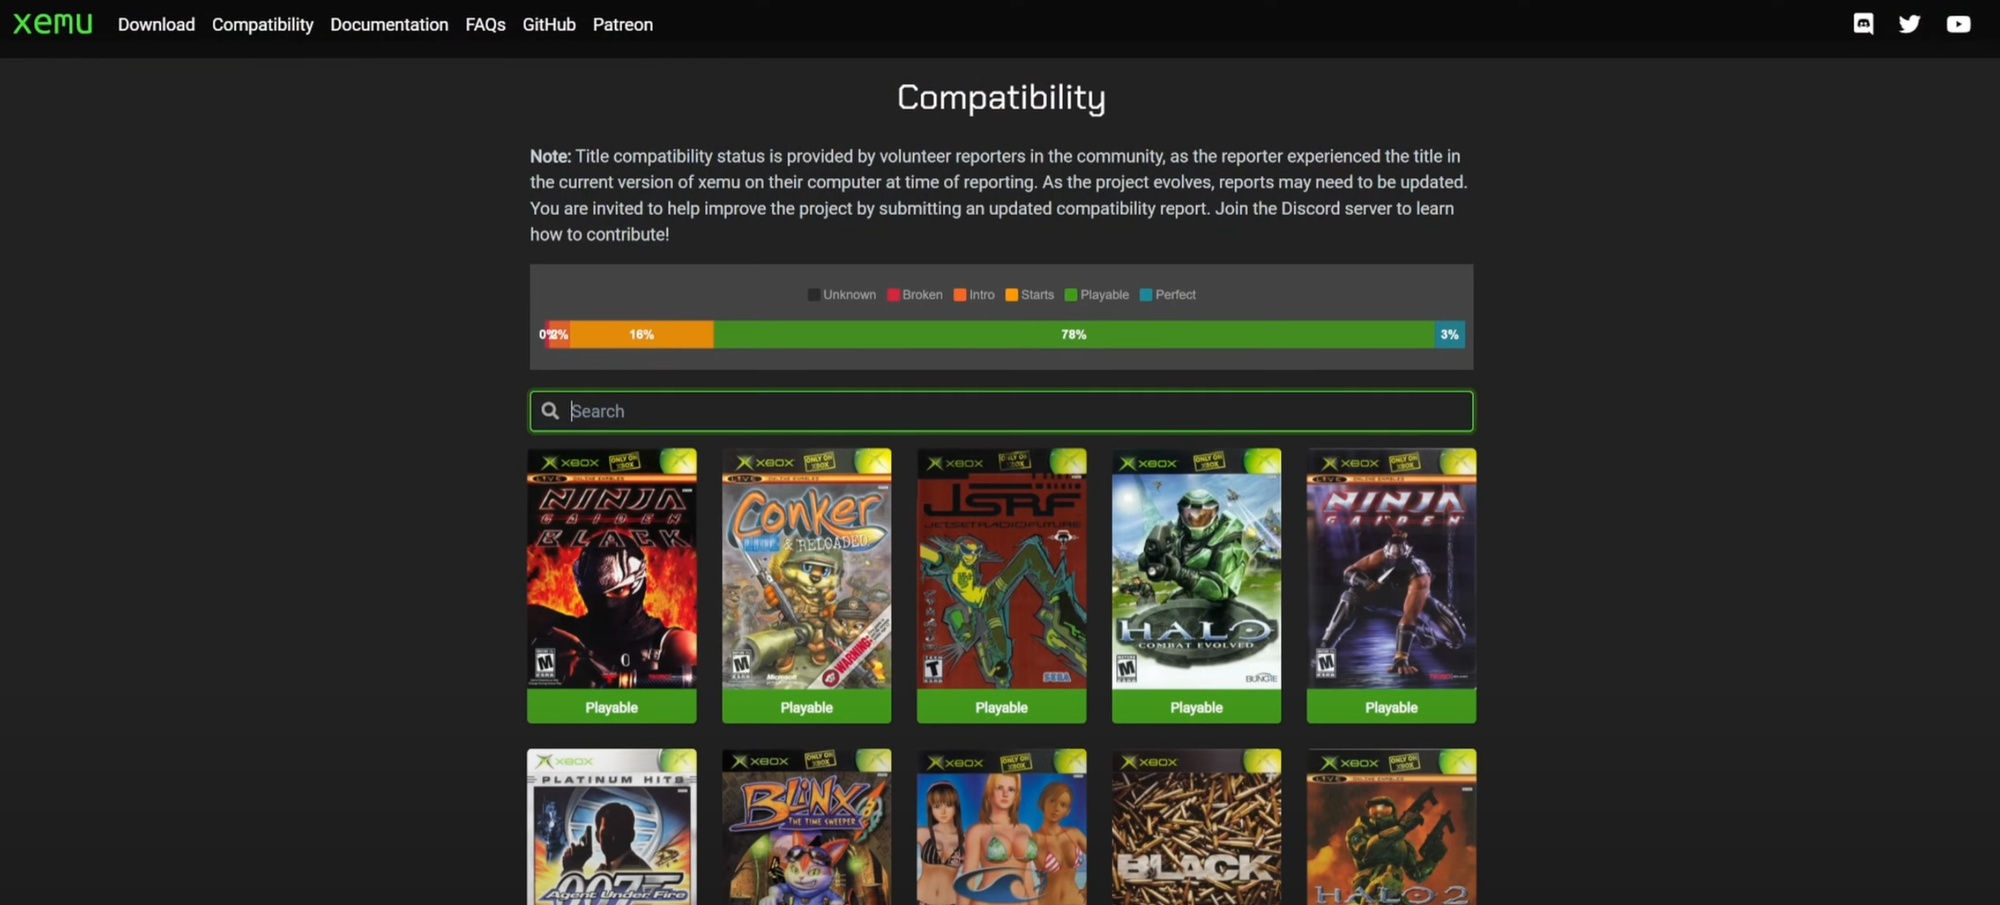
If the game does not boot, you might have encountered an unsupported title. You can open your browser and go to xemu.app and search for your game in the compatibility section. If it’s rated as “playable” or “perfect,” then you may want to double-check your BIOS file configuration.
You can also try other versions of BIOS files—which is something I had to do when writing this tutorial. The ones I’ve highlighted here are the ones I’ve had the most luck with.
Finally, try another game and see if that one works. If you still haven’t found a solution and games aren’t working, reference the Xemu documentation—there are some good guides over there. There’ll be a link in the description.
Step 4: Import Your Xbox Games Into Steam
Once everything is set up, close Steam by right-clicking on the icon in the system tray and choose Quit. Go to your desktop and find the Steam ROM Manager icon. Open it up, click Preview on the left, then click the Generate App List button at the bottom. After a moment, you should see all the ROMs that you’ve copied over.
If you have more than just Xbox ISOs in the emulation ROMs directory, you will see them here as well. Click Save App List, and your Steam library should be updated with these new entries.
Step 5: Go Back to Game Mode and Have Fun
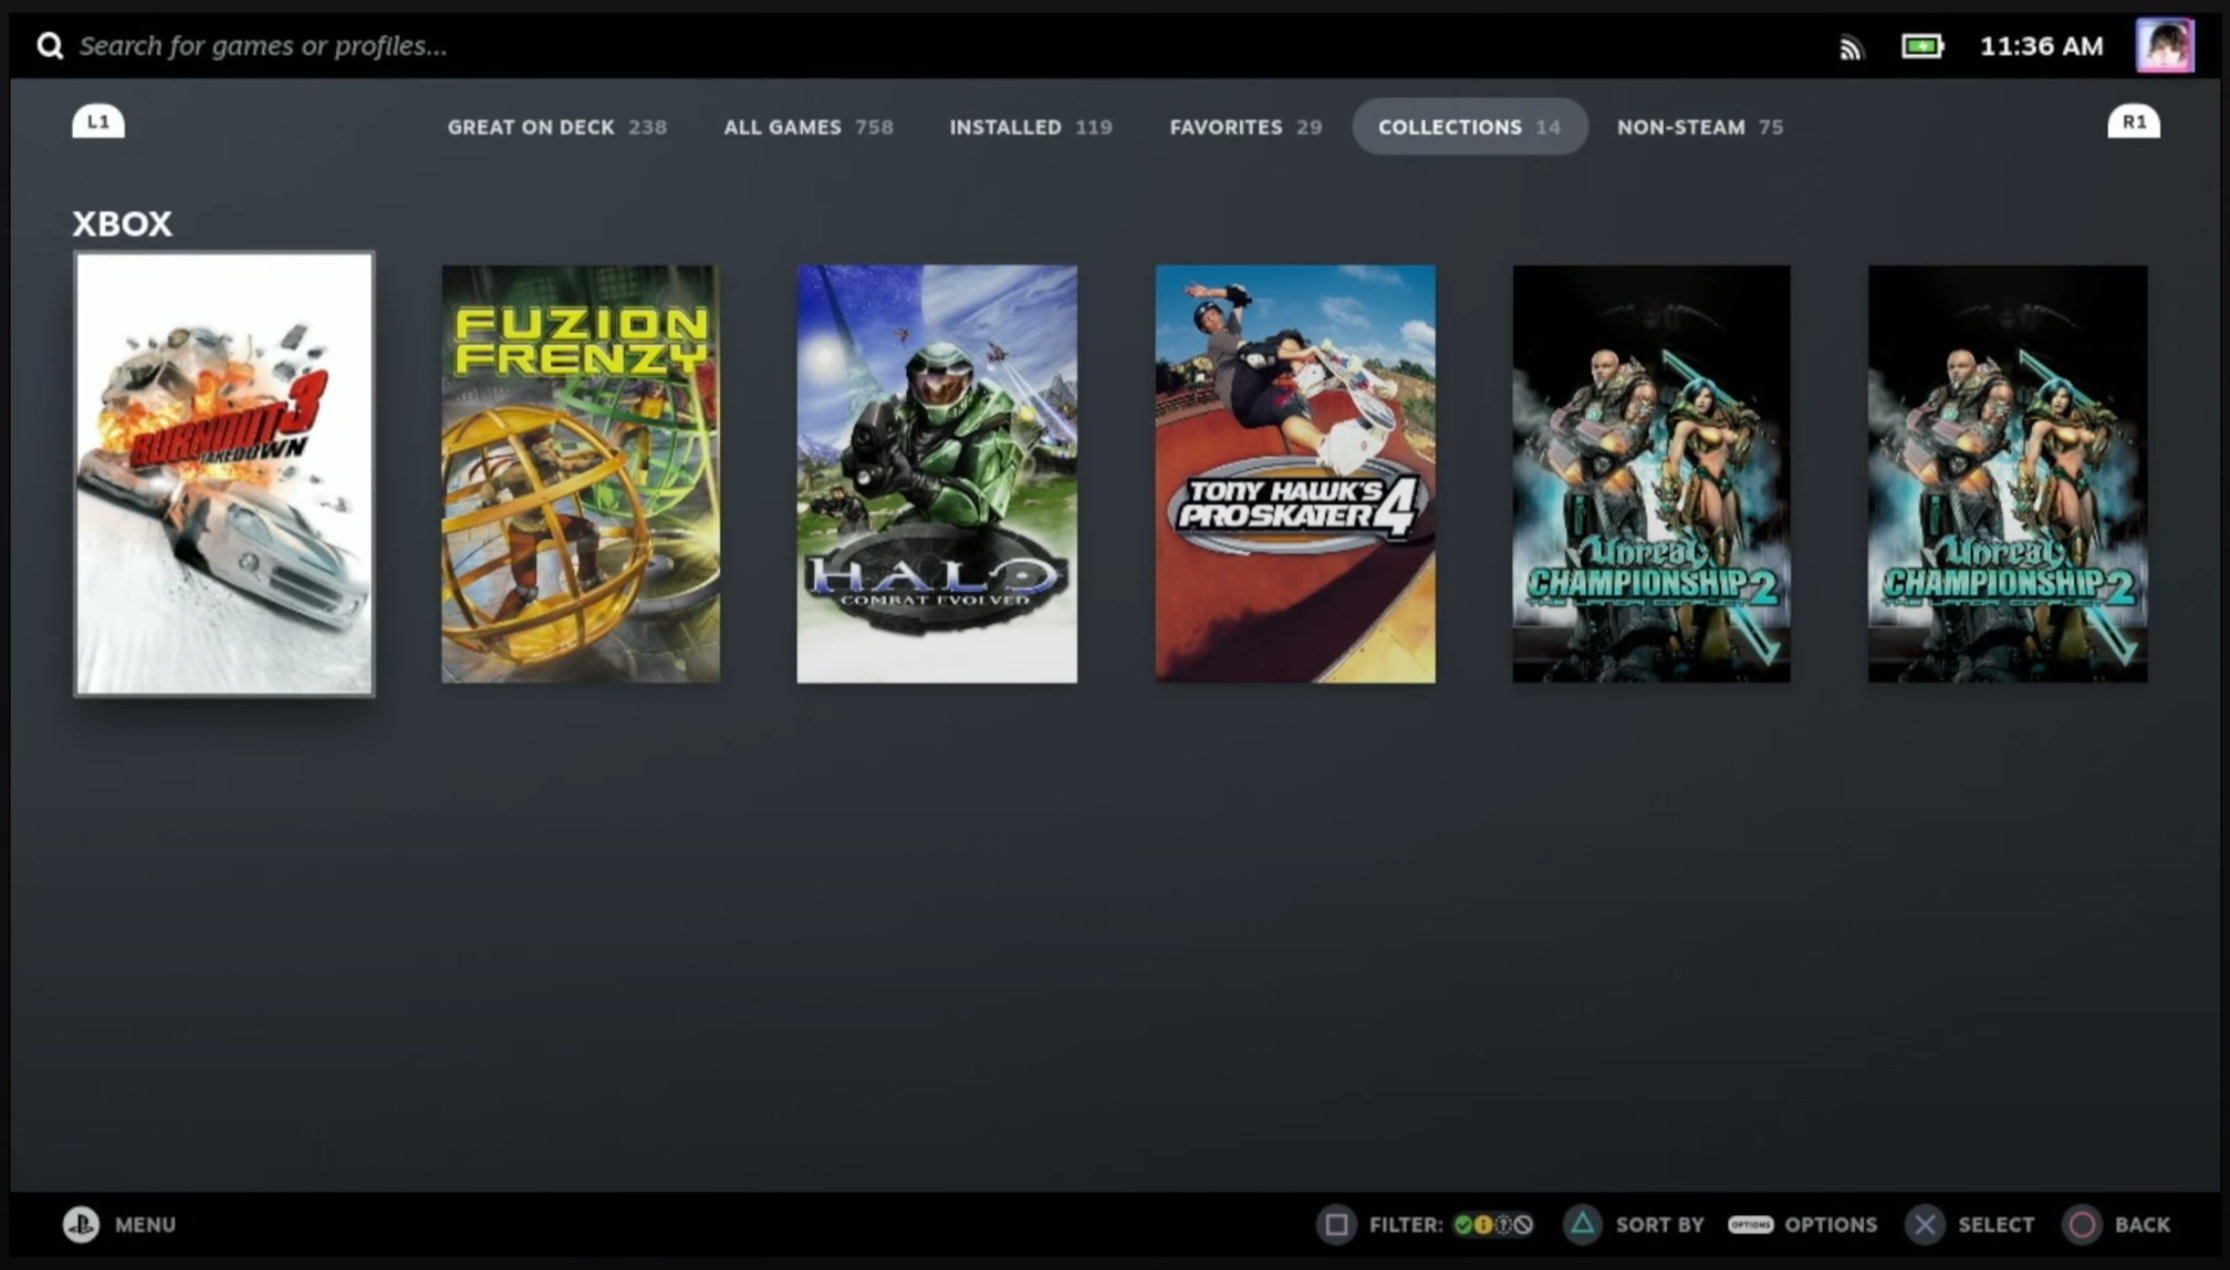
Now we’re ready. You can go back to Game Mode by clicking the Steam icon in the bottom left and then logging out, or by double-clicking the desktop icon that says “Return to Game Mode.” From here, go to your Steam Library and then to the Non-Steam Game section to see all of the ROMs you have. Or go to the Collections tab and choose Xbox. Launch any game and start having fun.
Step 6: Restore Xbox Live
Now there’s one more thing we could do—setting up Xbox Live. And yes, you read that right. There’s a project called Insignia that has brought the original Xbox Live back from the grave, and it’s possible to get set up with it using Xemu.
If you want to see a tutorial on how to get set up with that, leave me a comment below because that is going to be a fun video to make. I’d love to hear your thoughts on this article—did I miss something? Do you have more questions? Sound off in the comments—I’d love to hear from you.